9.06.2009

artpark brownies


I was reading Ruth Reichl's memoir, Tender at the Bone, when I got to this recipe. I mentioned brownies and all my roommates perked up. Luckily I live around the block from a 24-hr QFC, and good chocolate can be had at all hours of the night. Sometimes I wonder what the checkout people think of me, in my pajamas at 1am, buying two dozen eggs, heavy whipping cream, milk, 5 lbs of sugar, and 10 oz of the best unsweetened chocolate. (This, by the way, is what an ice-cream-making-kick and baking fetish does to your shopping lists.)

By the time the brownies came out of the oven, my roommates had gone to bed, and I decided to go to bed before the brownies had cooled enough to eat (sadly, brownies are better after they cool). The upshot of this: brownies for breakfast!
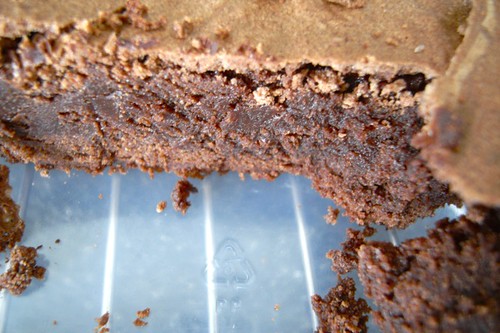
Artpark Brownies
from Tender at the Bone
makes 12 brownies

2/3 cup butter
5 ounces unsweetened, best-quality French chocolate (I used German. Don't tell the French.)
2 teaspoons vanilla
4 eggs
1/2 teaspoon salt
2 cups sugar
1 cup sifted flour (sift flour into 1-cup measure until heaping, then level with a flat object.)

Preheat oven to 400.

Butter and flour a 9" square baking pan (I used an 8" pan and added 7 minutes to the baking time.)

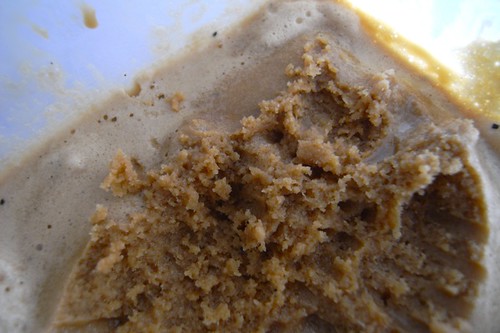
Melt butter and chocolate in double boiler, over boiling water. When melted, add vanilla and set aside.

Beat eggs and salt in mixer. Add sugar and beat at high speed for about ten minutes, or until mixture is quite white. (If you have a kitchenaid and use the middle speeds, this will not take ten minutes.)

Add chocolate and butter mixture and beat at low speed, just until mixed. Add flour and combine quickly, until there are no white streaks. (Do not overmix.)

Pour batter into pan and put into oven. Immediately turn oven down to 350 and bake for 40 minutes. The normal toothpick test will not work on these brownies, but if you want to try pricking them with a toothpick, it should not come out quite clean. Do not overbake; these brownies should be fudgy.

9.05.2009

chocolate ice cream sandwich cookies

If you ever want to make ice cream sandwiches, these are an excellent chocolate cookie. They're thin, so as not to overwhelm the ice cream, but they're chocolate enough to contribute flavor to a good pairing- I made sandwiches with the vietnamese coffee ice cream and it was mocha-licious. I've saved some of the cookies to try with the basil ice cream (coming soon) and with the mint. The advantage of ice cream sandwiches is that you can eat the ice cream without a spoon or bowl. No dishes!


I would advise freezing the cookies and letting the ice cream soften for a few minutes before assembling the sandwiches. If the ice cream is too hard it won't spread and if it is too soft it won't hold up thick enough to make a good sandwich. Once assembled, you want to freeze the whole contraption wrapped in plastic wrap for a while so that it becomes solid enough to eat. Otherwise, when you take a bite all the ice cream will squeeze out the far end like a bad jelly doughnut.


Chocolate Ice Cream Sandwich Cookies
from A Perfect Scoop
makes 16 cookies for 8 sandwiches

1/2 cup (115 g) unsalted butter at room temperature
1 cup (200 g) sugar
1 large egg at room temperature
1 teaspoon vanilla extract
6 tablespoons (50 g) unsweetened dutch-process cocoa powder
1 1/2 cups (210 g) flour
1 teaspoon baking powder
1/8 teaspoon salt

Preheat the oven to 350 and line two baking sheets with parchment or silicone baking mats. (It is important to line the sheets so that you can remove the cookies as soon as you take the sheets out of the oven, otherwise the cookies continue to bake on the baking sheet and become overdone.)

Beat together the butter and sugar in the bowl of a mixer until smooth. Beat in the egg and vanilla.

In a separate bowl, whisk together the cocoa, flour, baking powder, and salt. Stir the dry ingredients gradually into the creamed butter mixture until completely incorporated and there are no streaks of butter.

Form the dough into sixteen 1 1/2" (4 cm) rounds. On the baking sheets, flatten the rounds so they're 3 inches (8 cm) across, spacing them evenly. You can get 8 on a normal 11 x 17" baking sheet with three going lengthwise down the sides and two in the center in between.

Bake for 20 minutes, rotating the baking sheets midway during baking, then remove from the oven.

9.04.2009

vietnamese coffee ice cream


I adore coffee ice cream, and I especially love vietnamese coffee. I rarely drink it because I only have the opportunity when I'm going out for pho, and if I'm eating pho, I'm probably too broke to spend the extra three bucks on coffee. When I saw this recipe, I couldn't resist- now I have that coffee flavor in my freezer for whenever I want it! I made mine with cafe du monde coffee, as it is notoriously strong and I lack an espresso machine, but I'm sure anything you have around would work fine. I can't imagine that the pho restaurants are using anything fancier than cheap french roast brewed strong.

Now if only someone would gift me with a recipe for thai iced tea ice cream...

One advantage of this recipe is that it can be thrown together in the time it takes to brew the coffee- there is no custard, no stove. It's a one-bowl stir-to-combine convenience ice cream!

Vietnamese Coffee Ice Cream
from The Perfect Scoop
makes about 1 quart

1 1/2 cups (600g) sweetened condensed milk
1 1/2 cups (375 ml) brewed espresso or very strongly brewed coffee
1/2 cup (125 ml) half and half
big pinch of finely ground dark roast coffee

Whisk together all ingredients and chill thoroughly before freezing in your ice cream maker.

9.03.2009

fresh fig ice cream

My parents had a fig tree in their backyard when I was growing up (oh, the glories of southern californian weather) and every year we would have more figs than we could handle (and kumquats, and persimmons, and apricots... but i digress...) I was horrified to discover how much figs cost in the stores in the northwest. And they're not as good! Even the organic ones seemed less vibrant, less flavorful. Some day I will have my own fig tree, mark my words. The green ones with the white centers are delectable when chilled. Though, for this recipe, you want mission figs- the purple ones with the red insides.


I miss figs badly enough to approximate, so this recipe went onto the queue. This ice cream involves cooking the figs down into a jam, so it's okay if they're not the prettiest or the best figs you've ever seen. On the plus side, the color of this ice cream is phenomenal. After a half-dozen or more ice creams in varying shades of creamy pastels, I was ready for some boldness. And here it is.


The advantage of this recipe is that it does not require eggs, and therefore there is no fiddly egg-tempering custard-making step. Ease! It also does not freeze solid and is always easily scoopable.

Fresh Fig Ice Cream
from The Perfect Scoop

2 lbs (1kg) fresh figs (Lebovitz says about 20, I needed more like 30-35)
1/2 cup (125 ml) water
1 lemon
3/4 cup (150 g) sugar
1 cup (250 ml) heavy cream
1/2 teaspoon freshly squeezed lemon juice, or more to taste

Remove the hard stem ends from the figs, then cut each fig into eight pieces. (My figs were small and so I cut them into 4.) Put the figs in a medium, nonreactive saucepan with the water and zest the lemon directly into the pan. Cover and cook over medium heat, stirring occasionally, until the figs are tender, 8 to 10 minutes.

Remove the lid, add the sugar, and continue to cook, stirring frequently, until the figs are a jamlike consistency. Remove from the heat and let cool to room temperature. Once cool, puree the fig paste in a blender or food processor with the cream and lemon juice. Taste, then add more lemon juice if desired.

Chill thoroughly, then freeze in your ice cream maker.

9.02.2009

black pepper ice cream

I was hesitant about this one. It sounded intriguing, but a tablespoon of cracked pepper for roughly a pint of ice cream seemed like a LOT. I can tell you now though, there there is no reason to be hesitant at all- the ice cream is light and creamy with just a hint of black pepper to make it interesting. I almost wish the flavor were stronger- although if your black pepper is stronger than mine, it might turn out to be more intense. Peppercorns (all spices, really) weaken with time and mine may have been fairly old.


Lebovitz suggests pairing this with summer berries or pears and honey, or melon and lime. Once you've tasted the ice cream, you'll understand entirely. This is a good ice cream to feed to people who may be afraid of savory or unusual ice creams, as the taste is really not what you'd expect.


Black Pepper Ice Cream
from The Perfect Scoop
makes one pint

1/2 cup (125 ml) whole milk
1/3 cup (65 g) sugar
1 tablespoon black peppercorns, coarsely cracked (use a mortar and pestle or a bag and hammer.)
pinch of salt
1 cup (250 ml) heavy cream
3 large egg yolks

Warm the milk, sugar, peppercorns, salt, and 1/2 cup (125 ml) of the cream in a medium saucepan. Cover, remove from the heat, and let steep at room temperature for one hour.

Rewarm the peppercorn-infused mixture. Pour the remaining 1/2 cup (125 ml) cream into a large bowl and set a mesh strainer on top. In a separate medium bowl, whisk together the egg yolks. Slowly pour the warm mixture into the egg yolks, whisking constantly, then scrape the warmed egg yolks back into the saucepan.

Stir the mixture constantly over medium heat with a heatproof spatula, scraping the bottom as you stir, until the mixture thickens and coats the spatula (this happens quickly, so watch carefully). Pour the custard through the strainer, pressing the peppercorns gently to extract as much flavor as possible. Discard the peppercorns and stir the custard into the cream. Stir until cool over an ice bath (or skip this part).

Chill in the refrigerator, then freeze in your ice cream maker.

9.01.2009

cajeta / dulce de leche

I've used a lot of dulce de leche before- dulce de leche brownies" and dulce de leche cheesecake squares but I never posted the recipe I used to make dulce de leche from scratch. Which is to say, from milk as opposed to condensed milk.


The reason I didn't give you my previous dulce recipe is that the process took 8-12 hours and required that I wake up throughout the night to stir it. In retrospect, this may have been because I used an electric stove (which does not maintain a constant temperature) and I made several quarts at once (extending the cooking time).

I am happy to say that *this* dulce de leche-- or cajeta, if your prefer, or my bastardized version-- takes much less time. Roughly an hour, or a bit more if you prefer a thicker final product. The flavor is fantastic and this is definitely well worth it. You can spoon it over ice cream, or make something baked, or eat it straight out of the jar, or spread it over toast with chocolate. Believe me, you'll find ways to use it.


Dulce de Leche
makes about 1 cup

1 quart milk - goat (for cajeta) or cow (dulce de leche). Use the best you can find.
1 cup granulated sugar
1 vanilla bean (for dulce de leche) or cinnamon stick (cajeta)
1/2 teaspoon baking soda, dissolved in 1 tablespoon water

In a saucepan (at least 3qt), combine the milk and sugar. Split the vanilla bean (if using) along its length and scrape the seeds into the pot, then throw in the pod. Bring to a simmer, stirring until the sugar dissolves.

Remove from the heat after it reaches a simmer, and add the water/baking soda, stirring vigorously. The mixture will foam. When it settles, return it to the heat and keep an eye on it- it may still foam further. Bring it to a brisk simmer and keep it there for about an hour, or until it turns the shade of brown and consistency that you desire (this can range from maple syrup to jam). Once it simmers you can leave it be, checking in on it every so often, so long as you watch closely as it nears completion.

When you've got it where you want it (mine is like pourable caramel), take it off the heat, strain it, and cool it. This will keep up to a month in the fridge and ages in the freezer.

NOTE: Cajeta is goat's milk and cinnamon, and dulce de leche is cow's milk and vanilla. I used goat's milk and vanilla and have no idea what to call it. Next time I'll try it with cinnamon- it is important to use the cinnamon stick rather than the powder for this process.