6.30.2008

hazelnut brown butter cake

I'm sorry I've been so lax about posting. I have no excuses, other than that I've been eating instead of blogging. I have a backlog of about 3-5 things to get up here and I promise I'll get to it posthaste.

the ganache, it's taking over the world

So, about this cake. I intended to make it ages ago, because the name has the words Hazelnut and Brown Butter in it, and that's all I really needed to know. Then I read the recipe and saw that I had to get the skins off the hazelnuts and I had whip egg whites to stiff peaks, and I balked. De-skinning hazelnuts is a pain in the ass and I have an irrational fear of whipping egg whites, because I'm certain that I can't do it properly.

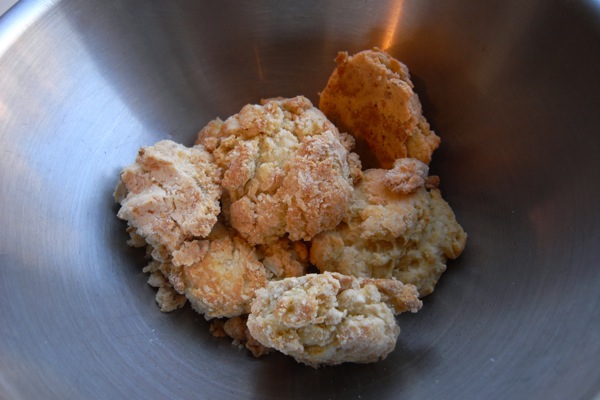
WELL. This cake is proof that you can do EVERYTHING wrong and your cake will still taste like these:


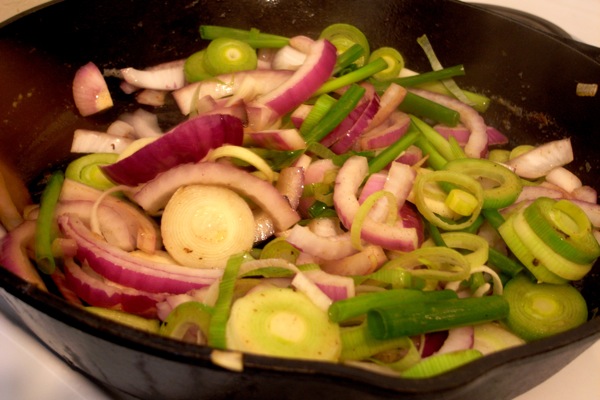
I blanched the hazelnuts with baking powder and then scrubbed them and rubbed them in a towel to get the skins off. Fail. I roasted them in the oven and then rubbed them so vigorously that they started breaking. And the skins stayed on. In frustration I gave up and dumped the nuts in the food processor anyway, looking like this:

hazelnuts

I ground them up with the other ingredients and then realized I probably didn't grind it fine enough. Oh well. Onward.

The brown butter got a bit over-brown. It didn't smell burnt, but it was more like Nearly Black Butter. Shit. Move on.

I have a new mixer. I was excited about this because I knew it could do the egg-white-whipping very quickly. Directions said on High, 8 minutes. I walked away and two or three minutes later I peeked into my mixer and all hell had broken loose. The eggs had become overbeaten IN 180 SECONDS. Speedy fucking Gonzales, that mixer is. After the nut debacle, I wanted to toss the whole mess in the garbage, but I figured fuck it, I'd gone this far. I won't regale you with the horror of blending the butter-nut-flour mixture into the eggs, but suffice to say that the contraption looked nothing like batter until the very last stage. I tossed it in the oven and hoped that the damn thing wouldn't explode.

In the end, what I had looked like a cake.

speckled hazelnut cake

I frosted (well, ganache-d) the sucker and tasted it. And holy hell, it was good.

ganache spilleth over

So, have no fear. Even if everything goes wrong, miracles occur in the oven.

Hazelnut Brown Butter Cake
Stolen from, as usual, Smitten Kitchen
Adapted from Sunday Suppers at Lucques (I must have this cookbook.)

Chef Goin served this as her wedding cake. I have learned that anything served as a wedding cake by someone who cooks is AMAZING.

5 ounces (about one heaping cup) hazelnuts, blanched to remove dark skins*
1/2 pound unsalted butter (plus 1 tablespoon melted extra for greasing the pan)
1/2 vanilla bean
1 1/3 cups powdered sugar, plus extra for dusting the cake
1/3 cups all-purpose flour
5 extra-large egg whites (I used 6 since I was using
large eggs)
3 tablespoons granulated sugar

Preheat oven to 350 °F.

Spread the hazelnuts on a baking sheet, and toast 12 to 15 minutes, until they’re golden brown and smell nutty. Let them cool.

Cut out a circle of parchment paper to fit in the bottom of a 10-inch round cake pan. Brush the pan with a little melted butter and line the bottom with the paper.

Place the rest of the butter in a medium saucepan. Slice the vanilla bean lengthwise down the center, and using a paring knife to scrape the seeds and pulp onto the butter. To make sure not to lose any of the seeds, run your vanilla-coated knife through the butter. Add the vanilla pod to the pan, and cook the butter until the butter browns and smells nutty (about 6 to 8 minutes). It helps to frequently scrape the solids off the bottom of the pan in the last couple minutes to ensure even browning. Set aside to cool. Remove the vanilla pod and discard.

Grind the hazelnuts with the confectioners’ sugar in a food processor until they’re finely ground. Add the flour and pulse to combine. Transfer to a large bowl.

Place the egg whites in the bowl of a stand mixer fitted with the whisk attachment. Add the granulated sugar and mix on high speed 4 to 5 minutes, until the mixture forms very stiff peaks. When you turn the whisk upside down, the peaks should hold. Transfer the whites to a large mixing bowl.

Alternate folding the dry ingredients and the brown butter into the egg whites, a third of a time. Remember to scrap the bottom of the brown butter pan with a rubber spatula to get all the little brown bits.

Pour the batter into the prepared cake pan, and bake for 50 minutes to 1 hour**. Cool on a rack 30 minutes. Run a knife around the inside edge of the pan, and invert the cake onto a plate. Peel off the paper, and turn the cake back over onto a serving platter. Sprinkle it with powdered sugar or cover with ganache (below).

* Do not fear if your blanching-and-rubbing or your roasting-and-scrubbing doesn't yield perfectly naked nuts. It's okay. Keep going.

** Mine was done at 40 minutes so check yours even earlier, okay?

Draping Ganache for 10-inch Cake

4 ounces semisweet chocolate chips or finely-chopped chocolate
1/4 cup heavy cream
1/2 teaspoon instant coffee granules

Melt the chocolate, heavy cream, and coffee in the top of a double boiler over simmering water until smooth and warm, stirring occasionally. Spread over the top of the cake.

6.17.2008

Vegan Quinoa Paella


Right now this is one of my favorite things to make when I really want to impress parents or houseguests or celebrate a birthday or non-birthday or whatever. Nothing’s better than feeding people delicious food, and this one blows the mind. Mmmm, actually, talking about this will be difficult to do right now. I just finished eating the leftovers of a slightly quicker version I made last night, and I’m afraid I might just go sneak some more bites after this write-up…

Living in Buenos Aires, it’s impossible to eat completely vegetarian, much less vegan. Well, it’s possible, I guess, but ill-advised. The meat and dairy here are just too effin’ good. Still, I have a sensitive tummy, and too much meat makes Annette a very unhappy and tired girl. So I found a version of this recipe online when looking for something vegan and chock-full of veggies. It’s nothing like an actual Spanish paella dish (*drool*), but seriously yummy in its own regard. Don’t expect in this recipe any attempts at replacing the saffron-y or seafood-y goodness of a Spanish paella (if you haven’t had a Spanish paella, go to a Spanish restaurant with the million friends you have and order this for your table right now). This paella, however, totally does the trick for a super healthy meal. Quinoa is practically a miracle grain - a complete protein with a ton of nutrients and amino acids; it’s easy to digest and even gluten-free! Though fairly protein-heavy, this meal is at least balanced by a ton of energizing vegetables. And it’s vegan and unbelievably delicious.

The paella is pretty easy to prepare for the most part. Most of the time is spent chopping vegetables, and the tofu can be fried quickly. Just cut tofu into strips, lay them in a single layer in hot oil and flip over once a side has browned. Don’t forget to add soy sauce for flavor! I like my tofu pretty crispy, because it adds a nice texture to the softer quinoa. A recipe I follow loosely for a Twice-fried Tofu is below. As hastily and incompletely as I make this, it still ends up delicious. It's really very difficult to mess up Fried Tofu.

Really, what I love sooo much about this dish is the variety of textures. It’s most like a paella in this way, I guess, which I’m completely fine with. It’s like a texture rainbow party; I can’t get enough of it. OMG and the leftovers are even better, especially if you fry extra tofu with them. As for the veggies, you can pretty much add whatever you’d like. I’m sure this would be amazing with broccoli florets and other greens. The possibilities are endless when you are already pretty much raping all that a paella traditionally is. Yay!

The quicker version I made last night is basically just whatever vegetables I had at the time, parsley instead of cilantro (because cilantro is almost impossible to find in the city), and no tofu or chickpeas or artichoke hearts. It wasn’t the same, but still yummy. The version below probably takes about a half hour to 45 minutes prepping and blanching and frying, and about 20 minutes cooking.

Vegan Quinoa Paella
(Recipe adapted from What the hell_does_a vegan eat anyway?)

1 tb olive oil
1 small red onion (I’ve only used yellow, but it’s delicious either way)
3-4 cloves garlic, minced
1 cup quinoa, rinsed and drained

1 tb smoked paprika
salt and pepper

1.5 cups water

1 red bell pepper (you can roast them or just put them in, sliced in strips)
1 cup green beans, blanched for 2-3 minutes
3 or 4 artichoke hearts, drained and sliced
15 oz. can of chickpeas, drained and rinsed
tofu, fried (Twice-fried tofu recipe below)
2 large or 3 small ears of corn
1 tbs cilantro, chopped (I use a lot more because I am obsessed with cilantro)
chopped almonds for garnish
4 or so lemon wedges


1. Chop veggies. (I like to put them in little size-appropriate bowls and organize them according to when I will add them, because this kind of stuff is fun to me.)

2. Bring water to boil in pot (for green beans).

3. Rinse and drain quinoa.

4. Blanche green beans.

5. Fry tofu, put aside.

6. In a large saute pan, on medium-low heat, add oil and sauté onions for 3-4 minutes, then add garlic and sauté for 1-2 minutes more.

7. Add quinoa and sauté for 2-3 minutes (you want to toast the quinoa a little bit in this part).

8. Add paprika, salt and pepper and stir. Then add water, bring to a boil, reduce and then simmer for 10-12 minutes until quinoa is cooked.

9. Add bell pepper, green beans, chickpeas, artichoke hearts and fried tofu on top of quinoa, cook for another 2-3 minutes until heated through.

10. Garish with almonds and cilantro. Serve with lemons.

I’d say this serves about 4-5 people with a high chance of leftovers.


Twice-Fried Tofu
Recipe from What the hell_does_a vegan eat anyway?

16 oz. extra-firm tofu cut into eight rectangular cutlets
canola oil
pepper
tamari

Cut the tofu into eight individual cutlets.

If you're smoking the tofu, add the hickory chips to your smoker box and process for 20-30 minutes. Remove the tofu from smoker box.

Over med-high heat add the canola oil and pan-fry until golden brown on both sides (about 8 minutes). Remove from pan and let cool for at least 10 minutes. Or, you can refrigerate the tofu at this point, up to a day in advance.

Slice the tofu diagonally into strips about a 1/4" thick. Add about 1 tsp. of canola oil to the pan, and return to med-high heat, turning occasionally for 3-5 minutes. Lower the heat to low, add tamari to taste (about 1 tbs.) and continue to cook for an addition 1-2 minutes until the tofu begins to get crispy.

If you don't have a smoker, you can add 1 tsp. of smoked paprika right after the tamari.

6.16.2008

garlic buttermilk biscuits, baked eggs

I came home from Portland early on Sunday specifically to host the potluck, and I'm glad I did: Javier brought octopus! Boiled and then coated in olive oil, coarse salt, and hot paprika, it was delicious.

javier's octopus

The process I described is really all there is to making the octopus, but the real skill lies in being able to tell when it's done. I can't help you there: Javier manned the stove for that one. I can tell you how to make the dish(es) I contributed: baked eggs and garlic biscuits.

garlic rolls

I had garlic biscuits at a restaurant called the Screen Door in Portland, and they were very good. Because I was sharing with others, I got only the bottoms of the biscuits. I thought: a whole one must be even better! I had been planning to make chive biscuits for my potluck, but the chives had gone bad over the weekend and I was craving garlic. I just swapped minced garlic for the chives and off I went.

baked eggs

The baked eggs looked delicious, and when I made them, they were quite good (and they were all eaten) but I thought they were a bit bland. As it turns out, I'd forgotten the pepper and the parmesan. Lesson: don't forget the flavorings!

Both recipes from Smitten Kitchen
Baked Eggs with Spinach and Mushrooms
Gourmet, June 2004

10 oz baby spinach leaves
1/4 cup finely chopped onion
1 garlic clove, finely chopped
2 tablespoons unsalted butter
5 oz mushrooms, thinly sliced (2 cups)
1/3 cup heavy cream
1/4 teaspoon salt
1/4 teaspoon black pepper
1/8 teaspoon freshly grated nutmeg
4 large eggs
2 tablespoons finely grated parmesan (I forgot this, and I'm kicking myself. Cheese makes everything better.)

Put oven rack in upper third of oven and preheat oven to 450°F.

Bring 1/2 inch water to a boil in a 10- to 12-inch ovenproof heavy skillet or pot (not cast-iron), then add half of spinach and cook, turning with tongs, until wilted, about 30 seconds. Add remaining spinach and wilt in same manner, then cook, covered, over moderately high heat until spinach is tender, about 2 minutes. Drain in a colander and cool under cold running water. Gently squeeze handfuls of spinach to remove as much liquid as possible, then coarsely chop.

Wipe skillet dry, then cook onion and garlic in butter over moderately low heat, stirring, until softened, 2 to 3 minutes. Add mushrooms and increase heat to moderate, then cook, stirring, until mushrooms are softened and have exuded liquid, about 3 minutes. Stir in cream, salt, pepper, nutmeg, and chopped spinach and bring to a simmer. Remove skillet from heat and make 4 large indentations in spinach mixture. Break an egg into each indentation and bake, uncovered, until egg whites are set but yolks are still runny, 7 to 10 minutes. Lightly season eggs with salt and pepper, then sprinkle with cheese.

Buttermilk Garlic Biscuits (these originally called for chives)
Adapted from Dot’s Diner, Boulder, CO (adapted again from Smitten Kitchen)

Makes 12 servings.

3 cups all purpose flour
1 teaspoon sugar (originally recipe calls for 2 tablespoons)
4 teaspoons baking powder
1 teaspoon salt
1 teaspoon baking soda
3/4 cup (1 1/2sticks) chilled unsalted butter, cut into 1/4-inch pieces
1/4 cup minced garlic
1 cup buttermilk

Preheat oven to 425°F. Whisk flour, sugar, baking powder, salt and baking soda in large bowl to blend. Using fingertips, rub 3/4 cup chilled butter into dry ingredients until mixture resembles coarse meal. Stir in chives. Add buttermilk and stir until evenly moistened. Using 1/4 cup dough for each biscuit, drop biscuits onto baking sheet, spacing 2 inches apart.* Bake until biscuits are golden brown on top, about 15 minutes. Cool slightly. Serve warm.

It says "12 servings" but I ended up with 17 biscuits and some extra powder in the mixing bowl... I think the recipe needs perhaps a bit more buttermilk (to make the powder into dough). You can either make larger biscuits (to end up with 12) or hope for 18-20 if you stick with 1/4 cup.

6.13.2008

garlic spears

I'd never had garlic spears before, but now that I have tried them, I want them every day. Garlic meets asparagus. Need I say more?

garlic spears

I chopped the ends off and washed the spears. Eaten raw, they are spicy like raw garlic. I sauteed the whole spears in butter and olive oil until the flavor mellowed a bit and they were bright green. I added pepper and lemon juice and devoured them. They're at the farmer's market now, which is awesome. I bet they would be great chopped up over a pasta. I cut one up into very thin slices and put it into a turkey burger, which was very good also. Have any of you had these before? What did you do with them?

garlic spears

6.12.2008

fresh pasta saga

I am totally intimidated by fresh pasta, despite the fact that it contains no yeast. I'd never made it, and I'd written it off as Something Other People Make, until I found this blog. The author is vulgar, snarky, hilarious, and a butcher. I was in lust. He makes pasta seem manageable somehow, in between all the swearing and drinking.

And that's pretty much what it's like.

fresh home-made pasta

I had three recipes to choose from: his, one at smitten kitchen, and the one that came with the pasta machine I bought at Ross that day. I opted for the one that came with the machine because it yielded enough pasta for six and I was throwing a potluck dinner party. Remember that rule about not trying new recipes out on guests? Right. There's a reason. A messy reason.

The process seems simple: 5 eggs and 3 cups of flour. Mix. Knead. Add more flour if it's a bit sticky. Let it rest for 30 minutes all wrapped in plastic and then roll it out and put it through the machine several times until it's thin and then again to cut it into fettuccine. Simple!

When the first guests arrived, including two people I hadn't met before, I was stirring the first bit of eggy floury dough. That shit was WET. Not just sticky, but cling-to-everything miserable. I added a handful more flour. It worked itself in, seemed okay, and then the mass got sticky again. Repeat. Repeat with what seemed like HALF A BAG OF FLOUR. Eventually, i gave up. My kitchen looked like a Columbian love-fest, since I had trailed flour everywhere I went. EVERYWHERE.

I had told my first guests that if the pasta experiment failed (as now seemed certain) then I would order pizza. At this point, my second guests arrived, bearing wine AND a homemade spicy chicken pizza. With cheese in the crust. Sometimes, god loves me. Only sometimes.

josh and allie's pizza

One of my guests, Josh, got really excited about the pasta machine and proceeded to attempt to screw it to every surface in the kitchen. This is when I realized that it's a very good thing that I didn't sell my dining table, since that's the only table that works for the pasta machine. I put the dough through a couple of times, but it was still too sticky and unworkable. I proclaimed defeat. Josh would not capitulate (makes sense, as he's not the one who spent an hour flouring the same mound of sticky hell). He put it through the machine, floured it, put it through again, floured it again, roll, flour, repeat. Fifteen minutes later THERE WAS PASTA DOUGH. We put it through the noodle-cutting bit, separated the strands, and boiled that shit until al dente.

In the end, it was a bit thick I think (we rolled until setting 4 or so, not a 9 like you're supposed to) and we didn't let it "rest" all sealed up like one should, and god knows how much flour was in there at the end... but what all this goes to say is that pasta is a lot harder to ruin than you might think. Everyone liked it! There was hardly any left over.

There was a pesto as well: after reading one of the comments to an earlier pesto pasta, I decided to make parsley-walnut pesto. At this point, I'd had a lot of wine, so measuring ingredients really wasn't going to happen. I threw some italian flat-leaf parsley, walnuts (toasted), olive oil, grated parmesean cheese, and pepper into the food processor until it tasted good, adjusting various quantities as needed. We also sauteed some crimini mushrooms to put over the top along with some shredded parmesean. The pesto was delicious and also tasted good days later on a baguette.

Sticky Buns in the morning.

This recipe is most fun when made as a pre-work baking date with a friend. In my case, I chose Greg. We only decided about half way through to include this on the blog, so some of the initial directions are a bit fuzzy. I recommend only making this if you already have a pretty good idea about bread dough.

First steps (optional):
Make some coffee.
Take some cold medicine.
make sure to brush your teeth

Gather:

Pasta for breakfast
a lot brown sugar
a lot flour
a lot of butter/ earth balance
5 over-ripe bananas
2ish cups of walnuts
yeast
white sugar
cinnamon
water
hugs

To begin, make your dough.

Go to grocery to store to buy white flour after you realize you have rye flour, soy flour, whole wheat flour, corn meal and pancake mix where you thought the white flour would be.

Before you leave be sure to add four cups of 100 degree water to a 12 qt bowl with .5 cup of white sugar and 2 TBSP of yeast.

While you're at the store. The yeast will reconstruct their civilization from their cryogenically freeze dried remnants. This process is exothermic, which you would be able to feel if you weren't at the store.

By the time you return, the yeast will have evolved into an industrious society that produces gluten by-products through the respiration of sucrolose, (CITE THIS) and will be ready.

Add some heaping handfuls (I started with 4) of your recently acquired white flour to the yeast civilization. Stir the flour in with a spoon and keep thickening gradually. When you reach the point when you can no longer mix with a spoon, use your hands! The flour will be sticky, so be sure to "clean" your hands with more flour while you mix and eventually begin to form a ball. Transfer the dough to your countertop But FIRST STOP

Thoroughly cover the countertop with many handfuls of flour before setting your dough on it.

Kneed the dough like you're giving CPR until you press your finger into the dough and it does not press back (the finger indentation stays). Or you can also just kneed the dough until its almost not sticky anymore.

Coat a large bowl with canola oil

Make the dough into a ball that somewhat resembles a brain by pulling the top dough down and under and then forming a funnel "V" shape with the palms of your hands and rubbing them back and forth with the V shaped dough wedge in between them. Brain wrinkles are a sign of superior intelligence, but research has definitively demonstrated that there is an inverse correlation between intelligence and tastiness, at least in terms of sticky bun dough, so keep the top smooth. (See illustration on the pizza dough post, forthcoming)

Put your dough brain into the large oil coated bowl and leave it in a warm place.

Let the dough rise for a duration equivalent to the time it takes to look for clip art, give up and draw a Macintosh 128 K with a heart diskette using Adobe Illustrator.

Punch down the dough (be nice)

Let the dough rise again while you read about the assassination attempt against Hitler by Georg Elser as written by Derek Jensen (about 4 pages, with time allowed for a verbal summary of the book so far)

Break the nuts gently by hand and coat them with brown sugar and put them in a hot place (like the oven) for 20 minutes at 350. You may use pecans or walnuts or hazelnuts or testicles.

Take your over-ripe bananas and whip them together with a handful of dark brown sugar. We added a cap-ful of Hazelnut liqueur.

Melt a half stick of butter in a pan on the stove over low-med heat. Add the whipped brown sugar and banana mix, and beat it constantly until its creamy and bubbly.

DON'T FORGET ABOUT THE NUTS!

When the nuts are done, chop them into spreadable pieces. Place them in a bowl and set aside. Mix cinnamon and sugar together, about 1:3, and also set it aside.

Re-flour your countertop surface and roll the dough into a sheet just slightly thinner than corrugated cardboard. Cover the dough thinly with banana. Then semi-thickly sugar. Then sparsely with nuts.

Roll the sheet up. Some of the dough will stick to the counter while you are rolling. It is useful to have your friend scrape that up as you go and keep it with the dough. We used a meat cleaver, but a metal spatula would be fine, I'm sure. When it's all done, squish in the sides of the cylinder so they are about flat.

Cut the dough log into 2-3 inch sections, and place on a buttered baking sheet, flat side down. They need about 17 minutes to cook, but check on them at 10-12 to make sure this seems right.

While the fetus buns are in the oven, mix a lot of brown sugar with a lot of butter. Like a cup of sugar, and third of a tub of earth balance. Over medium heat, bring this to a boil, stirring constantly. Then add some more butter if it's getting too thick. More sugar if it's too thin. If you need more, it's easy to make, and if there's too much, you will have extra-sticky sticky buns.


Play midwife/obstetrician to the buns, cover them with syrup and nuts.


Finally, bask in the deliciousness you have created.(Or in my case, rush off to work where they fire you. Fuckers.)

6.03.2008

dutch baby

I am not much of a breakfast person. I don't generally like eggs. I'm not a huge fan of sugar (despite my dessert-intensive blog, you may have noticed that the stuff I make is not that sweet, and I frequently cut the amount of sugar called for).

Yet this particular breakfast item is the reason I bought cast-iron pans. I have a cast-iron cookbook, and this is the only thing I make from that book.

dutch baby

It's called a "dutch baby," and it's eggs, flour, and milk, blended together and then baked in butter until it puffs like a sombrero. As it cools, it collapses, and then you slather it in more butter, lemon juice, and powdered sugar. I tend to go easy on the sugar and heavy on the butter. You must know by now: I <3 butter.

So, this isn't a pretty item (to say the least), but it is amazingly delicious, easy and cheap to make (if you don't have a cast-iron, get one), and each one feeds two people. It's rich and full of flavor, but the lemon keeps it from feeling overly heavy. It is the best breakfast food ever.

dutch baby

Dutch Baby
from The Cast Iron Skillet Cookbook
Feeds 2

Baby:
2 TB butter
4 large eggs
1/2 cup all-purpose flour
1/2 cup milk

Topping:
melted butter to pour over the top
lemon for juice (1 lemon per baby)
powdered sugar (1/2 cup recommended, just powder to taste)

Make it:
Preheat the oven to 425. Melt the butter in a 10" cast iron skillet over low heat. Mix the eggs, flour and milk in a blender until just blended. (Yes, you do need a blender for this--anything else leaves the flour chunky.) Pour the batter into the skillet with the melted butter.

Place the skillet in the oven and bake until the top puffs up and is LIGHTLY golden. Don't overbake it or you will be scraping it off the bottom of the pan. Check it at 15 minutes and 20 minutes, but it may take up to 25. Ovens vary.

Melt the butter for topping. The recipe says "clarify the butter" but I'm far too lazy for this early in the morning. People are lucky i'm in the kitchen messing with the oven at all.

Drizzle the butter over the top, squeeze a lemon (watch for seeds) over it, and sprinkle that powdered sugar. Eat.

spinach and orzo salad

I chose to make this salad because I had everything on hand except the spinach and feta, and also because I'm on a green-foods kick. I think that after spending a week living on sausages while moving into the new apartment, I really needed the vitamins that my last few days of meals have provided. Hooray for craving the things you need! This salad gets better the longer it sits, as the flavors continue to meld. This makes it perfect for leftovers, or for a potluck or dinner party as you can make it the day before.

spinach and orzo pasta salad

Picking a recipe, going to the store, cooking, taking pictures, doing the dishes, editing the photos, and writing the process up is actually a lot more work than one might think it is. So, I forgot to take pictures while cooking. In fact, I forgot about the photos until after I'd put the leftovers into tupperware and got it out again for lunch today. Forgive me.

spinach and orzo pasta salad

Spinach and Orzo Salad
from Simply Recipes

Ingredients

* 8 ounces orzo pasta
* Salt
* 1/4 cup pine nuts
* 6 ounces feta cheese, roughly crumbled
* 2 ounces Kalamata Greek olives pitted, roughly chopped, about 1/2 cup (about 20 olives)
* 4 ounces baby spinach
* 1/2 cup chopped red onion (about half a red onion)
* 3 Tbsp olive oil
* 1 Tbsp balsamic vinegar
* 1 Tbsp red wine vinegar (can substitute white vinegar or lemon juice)
* 1 teaspoon Dijon mustard
* Pinch dried basil
* Pinch dried tarragon
* Salt and freshly ground black pepper to taste

Method

1 Cook the orzo pasta. Bring to a boil a pot with 2 quarts of water in it. Once the water is boiling, salt it with a couple teaspoons of salt. Once the water returns to a boil add the orzo to the pot. Leave uncovered, cook on high heat with a vigorous boil. Put the timer on for 8-10 minutes, or whatever your pasta package says is appropriate for al dente (cooked but still a little firm). Drain. Rinse with cold water to cool quickly.

2 Toast the pine nuts by heating a small skillet on medium heat. Add the pine nuts and stir occasionally until the pine nuts are lightly browned. Pay attention or you'll burn the pine nuts.

3 Take half of the spinach and purée it in a food processor or blender, adding one tablespoon of the olive oil. Roughly chop the other half of the spinach. In a large serving bowl mix the spinach purée olive oil mixture in with cooked orzo until the pasta is well coated with the purée. Then gently mix in the remaining spinach, the red onion, feta cheese, pine nuts, and the Kalamata olives.

3 In a small jar, combine the remaining olive oil (2 Tbsp), balsamic vinegar, red wine vinegar, mustard, dried basil, and dried tarragon. Put a lid on the jar and shake to combine. (You can also just whisk together these ingredients in a small bowl, but the jar method works great to get a good emulsion.) Pour over orzo spinach mixture and gently mix in until well incorporated.

4 Chill for at least an hour before serving (the longer the better).

Serves 4.

rigatoni with five lilies and ricotta salata

Now that spring (summer?) is really here, I've been wanting more fresh things to eat. I also just moved and wanted to break in the new kitchen. And a friend from out of town visited and gave me a perfect excuse to make dinner. SO: I opened up the bookmarks and poked around.

rigatoni with five lilies and goat cheese

Everything for this recipe is easy to find, minus the Ricotta Salata. I substituted goat cheese (crumbled) and it worked well, so do not despair if you can't find the right cheese. As a bonus, everything except the cheese is also cheap.

the five lilies

This recipe also tastes even better the next day, and it tastes good cold, which is bonus-good because a pound of pasta is enough for lots of leftovers. And it's easy to make. Do you need more reasons to try it? Fine: caramelized onions. LEEKS. Now go!

prep

Rigatoni with Five Lilies and Ricotta Salata
Adapted from The Babbo Cookbook and the San Francisco Chronicle
Stolen from Orangette

3 Tbs extra-virgin olive oil
1 lb. sweet onions, such as Walla Walla or Vidalia, cut in half from stem to root and then into ¼-inch slices
2 Tbs unsalted butter
5 medium garlic cloves, minced
½ lb. leeks, cut into 1/8-inch rings and washed
½ lb. red onions, quartered and sliced
1 bunch scallions, trimmed and cut into 2-inch lengths
½ cup water
Salt, to taste
Pepper, to taste
1 lb. rigatoni

To serve:
4 oz. ricotta salata, coarsely grated (or whatever cheese you can find)
¼ cup finely chopped fresh Italian parsley
1 small handful chives, finely chopped
Flaky sea salt, such as Maldon
Lemon wedges, optional

In a large (12- to 14-inch) skillet, warm the olive oil over medium heat until hot but not smoking. Add the sweet onions, and reduce the heat. Cook over medium-low, stirring occasionally, until softened and translucent; then raise the heat to medium and cook, stirring often, until deeply golden and caramelized. Remove the pan from the heat, and transfer the onions to a bowl. Set aside.

In the same skillet, heat the butter over medium heat. When it has stopped foaming and is thoroughly melted, add the garlic, leeks, red onion, and scallions, and cook, stirring regularly, until very soft and golden. Add the water, and cook until the liquid evaporates. Season lightly with salt. Remove from the heat, and stir in the sweet onions.

Bring a large pot of salted water to a boil, and cook the rigatoni until tender but al dente. In the last minute of cooking, return the onion mixture to medium-high heat. Drain the pasta, add it to the onion mixture, and toss over medium-high heat for 1 minute. Remove from the heat and toss more, if necessary, to thoroughly disperse the onions amidst the pasta. Serve immediately, topped with plenty of ricotta salata and sprinklings of parsley and chives. Salt as needed, and finish with a quick squeeze of lemon, if you like.

Yield: 4 servings

tempeh mushroom fricassee with 40 CLOVES OF GARLIC OMG

I have a reputation for being a garlic fiend, constantly tripling recipe quantities and interpreting "clove" in the most liberal possible way (obviously the smaller cloves only count as half, right?) So, when I excitedly sat down with my new cookbook and opened to a random page only to see the phrase "with 40 cloves of garlic," I knew what needed to happen, and I knew it needed to happen right away.

I made 1.5x this recipe and it was a lot of food, most of which was promptly devoured. If I made it again, I think I'd consider adding a green (kale? chard?) and/or some other fresh herbs to fill out the flavor a little more, although the rich nuttiness of the tempeh mixed with the smoky mushroom flavor and the SWEET SWEET GARLIC is pretty full already. All the bite cooks out of the garlic -- it tastes similar to roasted garlic, flavorful but not harsh.

Ingredients:

  • 40 cloves of mutherfuckin' garlic, bitches!
  • 1lb heap 'o mixed mushrooms (I used shiitake and portobello, would've loved to try others)
  • 2 leeks (the white parts)
  • 1 12oz package of tempeh
  • 1.5 cups veggie broth/stock
  • a few springs of thyme
  • 1/4 cup dry white wine (I used a cheap chardonnay)
  • 2 tbsp soy sauce
  • salt and pepper to taste
  • parsley for garnish

Instructions:

  1. Chop the tempeh into bite-size pieces and sautée in olive oil over medium heat until it's golden brown on all sides (8-10min). Set it aside when done.
  2. While the tempeh's cooking, chop the leeks and mushrooms. (There are a lot of mushrooms in here -- they make a really awesome and imposing pile!) In a different (semi-deep) pan start them sautéeing in olive oil on medium heat until they're cooked down and lightly caramelized. Then add the white wine and soy sauce, raise the heat a tad, and cook a bit longer until the liquid is pretty reduced/soaked up.
  3. Add the veggie broth, garlic and tempeh to the mushrooms/leeks, along with the thyme, cover it, and let it simmer on low heat for like 20-30min. Uncover and raise the heat for a few minutes afterwards so the liquid thickens some more.
  4. Fish out the thyme pieces. Gorge.