12.28.2009

bread rotation

Second quarter's bread rotation was extremely stressful. The workload was designed for five or six people, and one rotation group had seven. My rotation had FOUR. This might not sound like much of a problem, but it was. Every day it felt like we were worried about time, and rushing to get things done. Work that we trusted to the first-quarter students didn't get done properly and had to be re-done the next morning, costing more time. We had to get to the bakeshop early every day to get the ovens on and the first dough mixed, because otherwise it wouldn't rise in time to use. '

On top of that, I started a new job that week, and my rotation partner moved from one apartment to another. We were an exhausted mess and how we got through those two weeks is beyond me. I did miss one day of that rotation.

So all that is a way of saying that I'm going to post a lot of pictures of bread below, and I'm not sure what all of them are. I barely remembered to take photos at all in the rush to get things out and down to the case.

No idea what this one is:


This is a capuchin roll, named after the monk's caps. We made them for Thanksgiving.


Butternut squash challah, topped with pumpkin seeds, also for Thanksgiving:


Regular challah:


Judging by the irregular shapes, I'm guessing that this is rustic pain au levain, made with the pain ordinaire for lunch service (we used to make rolls for service, but no longer have the duchess that cut the dough for us, and we don't have the time to do it all by hand):


Another one I can't remember for sure, but it might be our three-day levain:


This bread was mis-weighed because we accidentally turned the baker's scale around. Instead of weighing each portion to be 18 ounces, we ended up with each portion being 30 ounces. But, it was delicious.


Naan made using a starter and wheat flour:


Hazelnut-currant bread:

11.17.2009

dome aux epices

This post is special because it means I've achieved a goal I set for this blog- posting more this year than last year. I know it's been in fits and starts and sporadic posting binges, but I've kept the blog going for two years and I've posted an average of three posts per month (almost one per week!) and that's not terrible. If I keep it going my goal is to schedule the posting binges out so that instead of getting two weeks with a post every day and then two months of silence, you get fourteen weeks of posts once a week.

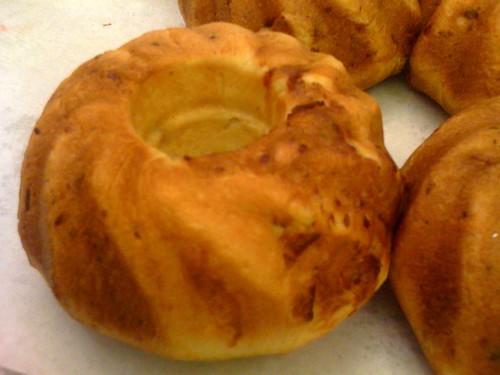
Anyway, on to the point of this post: the dome. Also called a bombe. I had great fun telling people that I was building bombes at school (they are indeed heavy and delicate and complicated) and then someone told me that perhaps considering my ethnic background, I should choose different words for posting on the internet. No way. I am going to milk my punny joy for all it's worth.


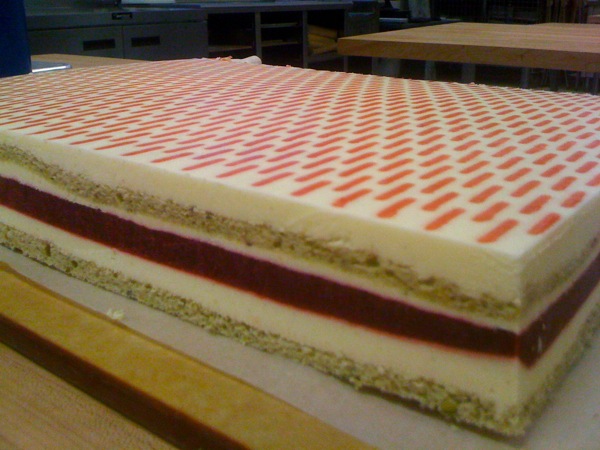
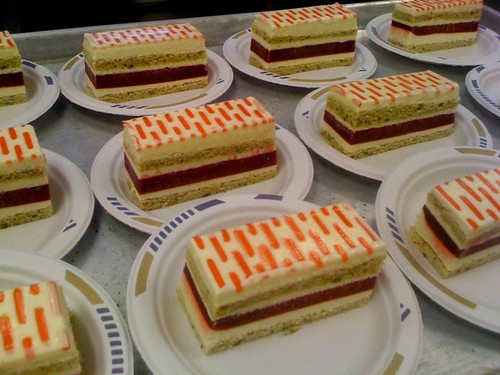
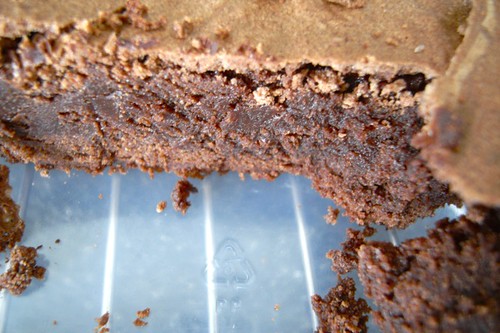
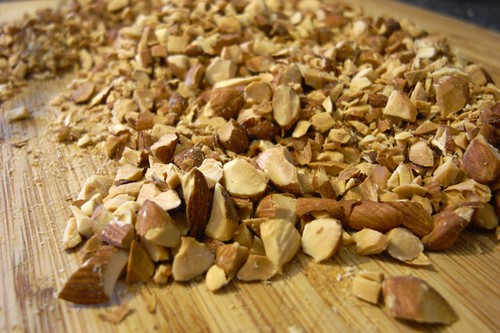
This dessert contained six elements: a chocolate mousse, gingerbread bavarian cream, spice cake (mostly egg whites and almond meal), shiny chocolate icing, gingerbread syrup, and a different spice cake (rye flour, honey) that served as an ingredient in the cream and the syrup.

The spice cakes are made first, and then the syrup, the cream, the mousse. The icing can be made whenever.

First, you pipe chocolate mousse into the molds a little over 1/3 of the way up. You dunk a circular cutout of the spice cake into the spice syrup and place it in the center of the mousse, pressing it in so that it's all level. You want the mold to be about half full when the cake is in.


Then you pipe in the spice bavarian cream, leaving about 1/4"-1/2" of space at the top so that you can press in another layer of dunked spice cake. Once the cake is in and level with the top of the mold, you can go back with more cream and fill in any space in the edges.


Then the dessert needs to be completely frozen. I put it in the blast freezer overnight. When you're ready to unmold, you want your shiny chocolate icing ready. These dessserts are unmolded in a tricky way. I thought I'd flip the mold over, torch the outside, and pop the mold off. No. You take a large bowl of hot water, dunk the mold in (don't get the cake wet!) and then flip the dessert out.

Flip the dessert out. Does that sound easy? This is what it involves: hold the wet mold in one hand. In your other hand, take a cardboard round a bit smaller than the diameter of the mold, and place it over the exposed cake. Press on one side so that the dome slides in the mold, and as it slides, invert your hands so that the mold comes off and the cake ends up upright on the round in your hand. Attempt to put the round down without touching any of the mousse.


Then freeze the tray again so that the slightly-softened mousses can set before you pour slightly-warm chocolate icing over them.

This chocolate icing is gorgeous. It's a deep, shiny black and it looks glittery. It's also a giant pain in the ass and I hate it. It has to cook for ages and it has to be poured at the right temperature, in great volume, quickly. You get one shot to pour it, because it begins to set immediately and any more poured over it won't smooth out. It also never sets entirely, and therefore nothing can touch the dessert at any point after it's been poured- not your spatula, not your fingers, not the sides of sheet trays or racks or doilies. The glaze will stick and peel off in a sheet.


On the plus side, decor sticks really well!


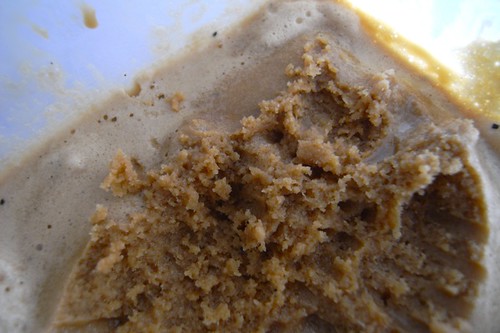
The chocolate mousse used in this dessert might be the best chocolate mousse I've tasted, so even though the recipe is a pain, I am going to give it to you because the texture and flavor are fabulous. It's silky and decadent.

Chocolate Mousse
140g sugar
50g water
120g yolk
100g whole eggs
350g chocolate 65%
500g whipped cream

Whip the yolks and whole eggs in a mixer. Cook the sugar and water to 240F (soft ball). While the mixer is running on high, slowly pour the soft-ball sugar down the side of the bowl into the eggs. Whip on high until cool. The mixture will be light and very fluffy (this is called a pate a bombe base). Melt the chocolate and cool until the whipped cream can be folded in without collapsing. Then fold in the pate a bombe.

11.16.2009

le monte cristo

This was the second cake I worked on, and it involved six separate elements: sacher chocolate cake, pastry cream, butter cream (combined into a mousseline coffee cream), coffee ganache, and trablit syrup.


This recipe also diverged the furthest from the printed version. By way of example, I am going to give you the cake and the mousseline procedures, as written and as performed.

Sacher chocolate cake:
650g marzipan at 50% (use almond paste)
400g icing sugar (use powdered sugar)
320g yolks (note: one yolk is ~15g)
150g butter
150g cocoa
75g flour
75g cornflour (use cornstarch)
480g egg whites
70g sugar

Recipe as printed:
In an electric mixer, whip the marzipan with the icing sugar. Add the yolks and the whole eggs gradually, beating until smooth. Whisk the eggs whites and and sugar to a firm snow, then fold a part of this into the marzipan mixture, then the melted butter, and the sifted mixture of flour, cornflour, cocoa, and finally the remainder of the egg whites. Spread out onto 60cm x 40cm silpat sheets at the rate of 650g/tray.

Recipe as performed:
Using the paddle, beat the almond paste at high speed until smooth. Lower speed and add the yolks one by one, beating until incorporated before adding the next. Change to the whisk attachment. Beat the whole eggs and sugar into the yolk-almond paste until uniform. While this is happening, use another mixer to beat the egg whites and sugar to firm peaks. By hand, fold this into the egg-almond-sugar mixture. Then fold in all the remaining sifted dry ingredients. Then fold in all the butter. Spread onto one silpat-lined sheet tray.

Mousseline coffee cream:
700g pastry cream
1200g buttercream
60g trablit (coffee essence)

Recipe as printed:
In the beater, with a whisk, flavor the pastry cream with the trablit, then, in second gear, incorporate the butter cream bit by bit.

Recipe as performed:
Whip the pastry cream by hand. Whip the trablit and buttercream by hand. Fold buttercream and pastry cream together, VERY CAREFULLY, by hand. Work the mixture as little as humanly possible.

(Chef's comment: "If you put this in the mixer, at all, I guarantee that it will break.")

Even the pastry cream and buttercream procedures as written do not mention tempering the egg yolks (they say "pour scalded milk over the creamed yolks and sugar") and so basically ask you to scramble your eggs.

Lesson: careful with recipes.


The cake turned out well, with two layers of chocolate-almond cake, a layer of the coffee mousseline, and a thick layer of coffee chocolate ganache. The sheet cake had to be skinned and leveled by hand, which was a terrifying procedure, but in the end my layers looked better than I'd expected they would. The whole cake was auctioned off for charity and the small slices were sold in the pastry case.

11.15.2009

cake and tart rotation

All I did was cakes. Two weeks, three cakes, and more creme anglaise than I ever thought I'd make.

This rotation taught me a lot about recipes. Namely, that one should never follow them. They are provided as a ruse to trick the eager and unsuspecting student. The chef is waiting for you to come to him to ask about technique, at which point he will inform you that what is written on that paper in your hand will only yield disaster.

The first cake is the emeraude pistache framboise. It is a layer cake composed of a pistachio sponge cake, a vanilla bavarian, and a raspberry gelee. This cake is mostly an exercise in getting layers spread across a sheet pan to be of an even depth, and that's harder than you'd think. I don't know why someone doesn't invent a cake collar with a grid. Or one that's transparent.

As you can see, this part of the cake looks great. Nice, even layers. Until you get to that bit on the left there. Oops.


The cake was made and assembled over two days, frozen overnight, and then cut and sold on the third day.


I ended up with sixteen small pieces and two medium cakes. The slices are cut with a long double-handled knife, and we heat the blade with a blow torch between slices. Since the cake is frozen, this makes slicing through it very easy. It's like a hot cake guillotine.

11.14.2009

breaking down a bunny

Warning: this post is full of bunny bits and meaty photos. If you're just here for the sweets and are squicked out by dissection, you may want to skip what follows.

On the day I was to deconstruct the rabbit, it took a very long time to thaw. My fellow students had told me that it took them roughly two hours (!) to complete the project, but by the time I could start, I only had an hour and a half until the end of class, including the half-hour designated for cleanup. And I had to get to work. This did not bode well. But eventually, we began.

This is a bunny, straight out of the bag- it's got its hind legs tucked into its stomach cavity, which leaves it looking sort of like a fetus. This, predictably, bothered some people.


First, you take the hind legs out and remove the organs from the bunny. There will be heart, kidney, and liver. Because bunnies are classed as poultry in this country for processing, the organs are removed and then replaced during butchery, and the organs you get may not have belonged to the actual bunny in hand. Mine had three hearts, and the bunny of the student next to me had none.

The first cut (after removing the kidney, which is left attached, and residual fat) is to remove the sides of the stomach area; there would be hangar steak and skirt steak here if this were a cow.


in this closeup you can see that the tenderloins- removing these is the next step. You must be careful, as they are small and fragile.


Once the tenderloins are taken care of (they're stacked together just above the bunny in the photo below) the hindquarters are removed, cutting up around the hip joint.

the legs are then deboned, leaving in the shinbone if desired. this is done by cutting around and along the bones on the seam visible there, starting with the wide end, scraping along the bone as you go.


After the hindquarters, the shoulders are removed completely (move the arm around to locate the edges of the scapulae) and deboned entirely. If there is an elegant way to do this, I'm not aware of it. I ended up with a messy pile of shoulder meat (I spared you that photo).


This is the point at which I ran out of time. The next cut is between the short ribs (top) and the long ribs (bottom). You cut toward the neck area until the short ribs are removed and the lower/back ribcage exposed.

The ribcage is separated from the lower spine by cutting where the ribcage meets the lower spine, and the top at the neck area is cut as well. Basically, cut away the spine that is not attached to the ribs.

The long ribs are trimmed to a reasonable length on each side, and then the ribs are cut from the spine to leave you with two little racks of rabbit. The ribs on these racks can then be frenched by cutting between the ribs and sliding the meat down to expose about 1/4"-1/2" of rib.


Bones can be used for stock. Meat yield in this project was around 70%.

11.13.2009

doughs, week two

remember those failed brioche? my poor sad brioche-sans-tetes were reincarnated as something much more delicious today:

these are the brioche, hollowed out, and stuffed with leeks and mushrooms cooked in white wine and cream. the whole thing is topped with comte cheese and finished in the oven until the cheese bubbles and browns. they were SO GOOD.


this is a kugelhopf. it's a brioche-like dough, filled with (in this case) ham, comte cheese, and onion. I wanted to eat it so bad.


whole wheat croissants- i'm not a big fan of these (whole wheat? why not use nonfat butter too? just suck all the fun right out.) but people who like whole wheat said they were tasty.


this is a pithivier; it's puff pastry (in this case, italian- contains honey and white wine) filled with whatever you like. mine contain ham, apples, blue cheese and walnuts. i called it a waldorf pithivier. in the oven they went from 1/4-1/2" thick to almost two inches. Magic!


And that's it for the dough rotation- croissants (regular and whole wheat, both with pre-ferments), brioche, puff pastry, and kugelhopfs. Lots of savory items, which are (shh, don't tell) my favorite. Next rotation is culinary.

11.12.2009

back in school

So I went back to school and immediately stopped posting. I apologize. Two jobs, a new internship, classes... *bitchwhinepissmoan*. Woe is me. But, I do have pictures and other things to share, and I'm going to start now before I get hopelessly behind and give up entirely.

These pictures are from the first week of my first rotation, which was doughs.

brioche a tetes- fail. misshapen and lost their heads.


they are supposed to look like this:


and these are pain au raisin, brioche rolled with vanilla pastry cream and rum-soaked currants, finished with an apricot glaze:


and finally, almond croissants- twice baked, soaked in rum simple syrup, filled with frangipane (almond paste), coated in almonds and powdered sugar:

9.06.2009

artpark brownies


I was reading Ruth Reichl's memoir, Tender at the Bone, when I got to this recipe. I mentioned brownies and all my roommates perked up. Luckily I live around the block from a 24-hr QFC, and good chocolate can be had at all hours of the night. Sometimes I wonder what the checkout people think of me, in my pajamas at 1am, buying two dozen eggs, heavy whipping cream, milk, 5 lbs of sugar, and 10 oz of the best unsweetened chocolate. (This, by the way, is what an ice-cream-making-kick and baking fetish does to your shopping lists.)

By the time the brownies came out of the oven, my roommates had gone to bed, and I decided to go to bed before the brownies had cooled enough to eat (sadly, brownies are better after they cool). The upshot of this: brownies for breakfast!

Artpark Brownies
from Tender at the Bone
makes 12 brownies

2/3 cup butter
5 ounces unsweetened, best-quality French chocolate (I used German. Don't tell the French.)
2 teaspoons vanilla
4 eggs
1/2 teaspoon salt
2 cups sugar
1 cup sifted flour (sift flour into 1-cup measure until heaping, then level with a flat object.)

Preheat oven to 400.

Butter and flour a 9" square baking pan (I used an 8" pan and added 7 minutes to the baking time.)

Melt butter and chocolate in double boiler, over boiling water. When melted, add vanilla and set aside.

Beat eggs and salt in mixer. Add sugar and beat at high speed for about ten minutes, or until mixture is quite white. (If you have a kitchenaid and use the middle speeds, this will not take ten minutes.)

Add chocolate and butter mixture and beat at low speed, just until mixed. Add flour and combine quickly, until there are no white streaks. (Do not overmix.)

Pour batter into pan and put into oven. Immediately turn oven down to 350 and bake for 40 minutes. The normal toothpick test will not work on these brownies, but if you want to try pricking them with a toothpick, it should not come out quite clean. Do not overbake; these brownies should be fudgy.

9.05.2009

chocolate ice cream sandwich cookies

If you ever want to make ice cream sandwiches, these are an excellent chocolate cookie. They're thin, so as not to overwhelm the ice cream, but they're chocolate enough to contribute flavor to a good pairing- I made sandwiches with the vietnamese coffee ice cream and it was mocha-licious. I've saved some of the cookies to try with the basil ice cream (coming soon) and with the mint. The advantage of ice cream sandwiches is that you can eat the ice cream without a spoon or bowl. No dishes!


I would advise freezing the cookies and letting the ice cream soften for a few minutes before assembling the sandwiches. If the ice cream is too hard it won't spread and if it is too soft it won't hold up thick enough to make a good sandwich. Once assembled, you want to freeze the whole contraption wrapped in plastic wrap for a while so that it becomes solid enough to eat. Otherwise, when you take a bite all the ice cream will squeeze out the far end like a bad jelly doughnut.


Chocolate Ice Cream Sandwich Cookies
from A Perfect Scoop
makes 16 cookies for 8 sandwiches

1/2 cup (115 g) unsalted butter at room temperature
1 cup (200 g) sugar
1 large egg at room temperature
1 teaspoon vanilla extract
6 tablespoons (50 g) unsweetened dutch-process cocoa powder
1 1/2 cups (210 g) flour
1 teaspoon baking powder
1/8 teaspoon salt

Preheat the oven to 350 and line two baking sheets with parchment or silicone baking mats. (It is important to line the sheets so that you can remove the cookies as soon as you take the sheets out of the oven, otherwise the cookies continue to bake on the baking sheet and become overdone.)

Beat together the butter and sugar in the bowl of a mixer until smooth. Beat in the egg and vanilla.

In a separate bowl, whisk together the cocoa, flour, baking powder, and salt. Stir the dry ingredients gradually into the creamed butter mixture until completely incorporated and there are no streaks of butter.

Form the dough into sixteen 1 1/2" (4 cm) rounds. On the baking sheets, flatten the rounds so they're 3 inches (8 cm) across, spacing them evenly. You can get 8 on a normal 11 x 17" baking sheet with three going lengthwise down the sides and two in the center in between.

Bake for 20 minutes, rotating the baking sheets midway during baking, then remove from the oven.

9.04.2009

vietnamese coffee ice cream


I adore coffee ice cream, and I especially love vietnamese coffee. I rarely drink it because I only have the opportunity when I'm going out for pho, and if I'm eating pho, I'm probably too broke to spend the extra three bucks on coffee. When I saw this recipe, I couldn't resist- now I have that coffee flavor in my freezer for whenever I want it! I made mine with cafe du monde coffee, as it is notoriously strong and I lack an espresso machine, but I'm sure anything you have around would work fine. I can't imagine that the pho restaurants are using anything fancier than cheap french roast brewed strong.

Now if only someone would gift me with a recipe for thai iced tea ice cream...

One advantage of this recipe is that it can be thrown together in the time it takes to brew the coffee- there is no custard, no stove. It's a one-bowl stir-to-combine convenience ice cream!

Vietnamese Coffee Ice Cream
from The Perfect Scoop
makes about 1 quart

1 1/2 cups (600g) sweetened condensed milk
1 1/2 cups (375 ml) brewed espresso or very strongly brewed coffee
1/2 cup (125 ml) half and half
big pinch of finely ground dark roast coffee

Whisk together all ingredients and chill thoroughly before freezing in your ice cream maker.

9.03.2009

fresh fig ice cream

My parents had a fig tree in their backyard when I was growing up (oh, the glories of southern californian weather) and every year we would have more figs than we could handle (and kumquats, and persimmons, and apricots... but i digress...) I was horrified to discover how much figs cost in the stores in the northwest. And they're not as good! Even the organic ones seemed less vibrant, less flavorful. Some day I will have my own fig tree, mark my words. The green ones with the white centers are delectable when chilled. Though, for this recipe, you want mission figs- the purple ones with the red insides.


I miss figs badly enough to approximate, so this recipe went onto the queue. This ice cream involves cooking the figs down into a jam, so it's okay if they're not the prettiest or the best figs you've ever seen. On the plus side, the color of this ice cream is phenomenal. After a half-dozen or more ice creams in varying shades of creamy pastels, I was ready for some boldness. And here it is.


The advantage of this recipe is that it does not require eggs, and therefore there is no fiddly egg-tempering custard-making step. Ease! It also does not freeze solid and is always easily scoopable.

Fresh Fig Ice Cream
from The Perfect Scoop

2 lbs (1kg) fresh figs (Lebovitz says about 20, I needed more like 30-35)
1/2 cup (125 ml) water
1 lemon
3/4 cup (150 g) sugar
1 cup (250 ml) heavy cream
1/2 teaspoon freshly squeezed lemon juice, or more to taste

Remove the hard stem ends from the figs, then cut each fig into eight pieces. (My figs were small and so I cut them into 4.) Put the figs in a medium, nonreactive saucepan with the water and zest the lemon directly into the pan. Cover and cook over medium heat, stirring occasionally, until the figs are tender, 8 to 10 minutes.

Remove the lid, add the sugar, and continue to cook, stirring frequently, until the figs are a jamlike consistency. Remove from the heat and let cool to room temperature. Once cool, puree the fig paste in a blender or food processor with the cream and lemon juice. Taste, then add more lemon juice if desired.

Chill thoroughly, then freeze in your ice cream maker.

9.02.2009

black pepper ice cream

I was hesitant about this one. It sounded intriguing, but a tablespoon of cracked pepper for roughly a pint of ice cream seemed like a LOT. I can tell you now though, there there is no reason to be hesitant at all- the ice cream is light and creamy with just a hint of black pepper to make it interesting. I almost wish the flavor were stronger- although if your black pepper is stronger than mine, it might turn out to be more intense. Peppercorns (all spices, really) weaken with time and mine may have been fairly old.


Lebovitz suggests pairing this with summer berries or pears and honey, or melon and lime. Once you've tasted the ice cream, you'll understand entirely. This is a good ice cream to feed to people who may be afraid of savory or unusual ice creams, as the taste is really not what you'd expect.


Black Pepper Ice Cream
from The Perfect Scoop
makes one pint

1/2 cup (125 ml) whole milk
1/3 cup (65 g) sugar
1 tablespoon black peppercorns, coarsely cracked (use a mortar and pestle or a bag and hammer.)
pinch of salt
1 cup (250 ml) heavy cream
3 large egg yolks

Warm the milk, sugar, peppercorns, salt, and 1/2 cup (125 ml) of the cream in a medium saucepan. Cover, remove from the heat, and let steep at room temperature for one hour.

Rewarm the peppercorn-infused mixture. Pour the remaining 1/2 cup (125 ml) cream into a large bowl and set a mesh strainer on top. In a separate medium bowl, whisk together the egg yolks. Slowly pour the warm mixture into the egg yolks, whisking constantly, then scrape the warmed egg yolks back into the saucepan.

Stir the mixture constantly over medium heat with a heatproof spatula, scraping the bottom as you stir, until the mixture thickens and coats the spatula (this happens quickly, so watch carefully). Pour the custard through the strainer, pressing the peppercorns gently to extract as much flavor as possible. Discard the peppercorns and stir the custard into the cream. Stir until cool over an ice bath (or skip this part).

Chill in the refrigerator, then freeze in your ice cream maker.

9.01.2009

cajeta / dulce de leche

I've used a lot of dulce de leche before- dulce de leche brownies" and dulce de leche cheesecake squares but I never posted the recipe I used to make dulce de leche from scratch. Which is to say, from milk as opposed to condensed milk.


The reason I didn't give you my previous dulce recipe is that the process took 8-12 hours and required that I wake up throughout the night to stir it. In retrospect, this may have been because I used an electric stove (which does not maintain a constant temperature) and I made several quarts at once (extending the cooking time).

I am happy to say that *this* dulce de leche-- or cajeta, if your prefer, or my bastardized version-- takes much less time. Roughly an hour, or a bit more if you prefer a thicker final product. The flavor is fantastic and this is definitely well worth it. You can spoon it over ice cream, or make something baked, or eat it straight out of the jar, or spread it over toast with chocolate. Believe me, you'll find ways to use it.


Dulce de Leche
makes about 1 cup

1 quart milk - goat (for cajeta) or cow (dulce de leche). Use the best you can find.
1 cup granulated sugar
1 vanilla bean (for dulce de leche) or cinnamon stick (cajeta)
1/2 teaspoon baking soda, dissolved in 1 tablespoon water

In a saucepan (at least 3qt), combine the milk and sugar. Split the vanilla bean (if using) along its length and scrape the seeds into the pot, then throw in the pod. Bring to a simmer, stirring until the sugar dissolves.

Remove from the heat after it reaches a simmer, and add the water/baking soda, stirring vigorously. The mixture will foam. When it settles, return it to the heat and keep an eye on it- it may still foam further. Bring it to a brisk simmer and keep it there for about an hour, or until it turns the shade of brown and consistency that you desire (this can range from maple syrup to jam). Once it simmers you can leave it be, checking in on it every so often, so long as you watch closely as it nears completion.

When you've got it where you want it (mine is like pourable caramel), take it off the heat, strain it, and cool it. This will keep up to a month in the fridge and ages in the freezer.

NOTE: Cajeta is goat's milk and cinnamon, and dulce de leche is cow's milk and vanilla. I used goat's milk and vanilla and have no idea what to call it. Next time I'll try it with cinnamon- it is important to use the cinnamon stick rather than the powder for this process.

8.31.2009

saffron ice cream


This is a gorgeous ice cream-- bright yellow with red saffron threads-- with a unique and highly addictive flavor. Sweet and saffron-savory, Lebovitz suggests pairing it with pine nuts, rosewater, oranges, cinnamon, and/or quince.

I find this preparation to be a touch too sweet, but others I've fed it to claim it's perfect as is. Your call.

Saffron Ice Cream
from The Perfect Scoop
makes one pint

1/2 cup (125 ml) whole milk
1 cup (250 ml) heavy cream
1/2 cup (100g) sugar
scant 1/2 teaspoon saffron threads (affordable at Trader Joe's)
3 large egg yolks

Warm the milk, cream, and sugar in a small saucepan. Remove from the heat and add the saffron. Pour in a small bowl (I used a 2-cup pyrex measuring cup) and steep in the refrigerator for 4 hours. (It was very, very late when I began this, so I let it steep overnight rather than stay up another four hours.)

Strain the saffron-infused mixture into a medium saucepan. Rescue the threads of saffron and put them in a medium bowl. Set the strainer over the top. (I did not strain my mixture. In fact I have no recollection of reading this step. It was early in the morning.)

Rewarm the saffron-infused mixture. In a separate medium bowl, whisk together the egg yolks. Slowly pour the warm saffron mixture into the egg yolks, whisking constantly, then scrape the warmed egg yolks back into the saucepan.

Stir the mixture constantly over medium heat with a heatproof spatula, scraping the bottom as you stir, until the mixture thickens and coats the spatula. Pour the custard through the strainer and stir to incorporate the saffron threads. Stir until cool over an ice bath (I did not do this.)

Chill thoroughly in the refrigerator, then freeze in your ice cream maker. Make sure to get all the saffron threads off the dasher and mix them back into the ice cream when you remove it from the machine.

A NOTE on ice cream makers: do not try to use your machine more than once in a 24-hr period if it is the kind that has a frozen canister. No matter how cold you think that canister is, the second batch will not turn out as well as the first. My second batch (an olive oil ice cream) remained fairly soupy after churning and froze in the freezer to the density of gelato, but with ice crystals that marred the texture.

8.30.2009

fresh mint ice cream

This mint ice cream tastes like no other mint ice cream I've ever had. It tastes *exactly* like my mint plant. It's bright and fresh and tastes downright healthy in a way no ice cream ever has before. I could eat it forever. Find some delicious mint (or grow your own!)


Fresh Mint Ice Cream
from The Perfect Scoop

1 cup (250ml) whole milk
3/4 cup (150g) sugar
2 cups (500ml) heavy cream
pinch of salt
2 cups (80g) lightly packed mint leaves
5 large egg yolks

Warm the milk, sugar, one cup of cream, and salt in a small saucepan. Add the mint leaves and stir until immersed. Cover, remove from the heat, and let steep at room temperature for an hour.

Strain the mint-infused mixture through a mesh strainer into a medium saucepan. Press on the mint leaves to extract as much of the flavor as possible, then discard the mint leaves. Pour the remaining cup of cream into a large bowl and set the strainer on top.

Rewarm the mint-infused mixture. In a separate medium bowl, whisk together the egg yolks. Slowly pour the warm mint liquid into the egg yolks, whisking constantly, then scrape the warmed egg yolks back into the saucepan.

Stir the mixture constantly over medium heat with a heatproof spatula, scraping the bottom as you stir, until the mixture thickens and coats the spatula. Pour the custard through the strainer and into the cream.

Stir until cool over an ice bath and/or chill thoroughly in the refrigerator. Freeze in your ice cream maker.

8.29.2009

toasted almond ice cream

This ice cream has a fantastically strong almond flavor, and would go fabulously with fruit of all kinds. Suzanne Goin (Sunday Suppers again) pairs it with cherry-- I found this recipe because I desperately wanted to make the roasted cherry tart-- but as it turns out it was easier to get the ice cream done first. I'd also just made both the brown butter and the olive oil ice creams and I thought perhaps my roommates might like something more 'normal'.


When I do it again I may cut the amount of almond extract a bit, as the flavor is so strong some may think it borders on the artificial (do make sure you use pure almond extract!). This ice cream is full of toasted almonds, and is great for people that love chunky ice cream. You could add cherries or chocolate as well.

Almond Ice Cream
from Sunday Suppers at Lucques by Suzanne Goin

2 1/2 cups raw whole almonds
2 cups whole milk
2 cups heavy cream
4 extra-large egg yolks (if you have large eggs, use 5 yolks)
1/2 cup granulated sugar
1 tsp pure almond extract (or less- definitely not more)

Preheat the oven to 375.

Toast the almonds on a baking sheet in the oven for 10-12 minutes or until they darken slightly and smell nutty. When they've cooled, chop them coarsely.

Place 1 1/2 cups of the chopped almonds in a medium saucepan and pour in the milk and cream. Bring to a boil over medium heat. Turn off the heat, cover, and let the flavors infuse for at least thirty minutes.

Bring the mixture back to a boil over medium heat, stirring occasionally, then turn off the heat.

Whisk the egg yolks and sugar together in a bowl. Whisk a few tablespoons of the warm cream mixture into the yolks to temper them. Slowly, add another 1/4 cup or so of the warm cream, whisking to incorporate. At this point, you can add the rest of the cream mixture in a slow, steady stream, whisking constantly. Pour the mixture back into the pot and return to the stove.

Add the almond extract and cook the custard over medium heat for 6-8 minutes, stirring frequently with a rubber spatula, scraping the bottom and sides of the pan. When it coats the back of a spatula or spoon, it's done. Strain the mixture and chill at least two hours in the refrigerator. Process in the ice cream maker and stir in the remaining almonds when it's done.

This ice cream is best within a few days of when it's made.

8.28.2009

brown butter ice cream

Jeffery Steingarten wrote an entire article extolling the virtues of brown butter in Vogue magazine, and included a recipe for ice cream. I committed a gym-magazine faux pas and tore the article out (I hereby admit to reading all the trashy magazines at the gym while on the elliptical machine) but promptly forgot it in Scott's car.

So. To my glee, Chez Pim read the same article, and was inspired to post her own brown butter ice cream recipe shortly after I got my ice cream maker. Since it was easier to drag my laptop into the kitchen than it was to go to the car and grab the magazine pages, I made the Chez Pim version.


I wish that I had browned the butter further, as I didn't think that the nuttiness came through enough in the final product, but this recipe certainly yields a very rich, buttery ice cream. If you're a fan of butter you must give it a shot. I like to sprinkle a bit of salt over the top when serving.


Brown Butter Ice Cream, Glace au Beurre Noisette
via Chez Pim

225g/8oz/1cup butter
350ml/12oz/1.5 cup milk
350ml/12oz/1.5 cup cream
110g/1/2 cup sugar
6 yolks
1teaspoon salt

Cut butter into cubes and place in a medium pot over medium heat. Keep an eye on it and stir frequently so that the butter cooks evenly. I got mine to the color on Pim's website, but I wish I'd gone further-- use your judgment and taste. Wait at least long enough for the butter to take on a nutty aroma.

Set the butter aside and get the pot clean enough to re-use. Divide the sugar between the pot and the blender. I used a food processor and would not recommend it- it's not designed to hold as much liquid as you're going to have. Add the milk to the sugar in the pot and stir to dissolve over medium heat. Leave the pot on medium heat to bring the milk to a simmer.

Add the yolks to the sugar in the blender and turn it on. As the blender is running, slowly add the warm brown butter and blend until incorporated. When the milk/sugar mixture reaches a simmer, pour it into the running blender as well. Add the salt, pulse, and you're done.

Add the cold cream to the blender and blend, then chill the whole shebang until completely cool. Churn in your ice cream maker. Voila!

If you're a brown butter fan, you should also check out this hazelnut brown butter cake!

8.27.2009

olive oil ice cream

And now begins the onslaught of ice creams. I'd been talking about getting an ice cream maker for well over a year, but even though they're fairly cheap as far as kitchen gadgets go (you can easily find one for under $50) it just seemed so... impractical somehow. After all, I don't eat ice cream that often, and the ingredients (heavy cream, eggs, fresh fruit) can be prohibitively expensive on my paltry pseudo-salary.

Then I was gifted with a machine, and I've done nothing but make ice cream (okay, and olive oil cake) for the last couple of weeks. I'll put each ice cream in its own post, because otherwise this would be ridiculously long, but they won't all have pictures. For some reason all of my ice creams are in the same color family and you'd swear I was just shooting the same pint container over and over again.


So let's start! I adore olive oil (see cake below) and so this ice cream was the first one I attempted. Try to find a fruity olive oil with a bright flavor- I've used both an Italian one and a Californian one from Trader Joe's. Use the best you can afford, because the flavor will be pure.


Olive Oil Ice Cream
from The Perfect Scoop by David Lebovitz

1 1/3 c (330ml) whole milk
1/2 c (100g) sugar
pinch of salt
1 c (250 ml) heavy cream
6 large egg yolks
1/2 c (125 ml) olive oil

Warm the milk, sugar and salt in a medium saucepan. Pour the cream into a large bowl and set a mesh strainer on top.

In a separate medium bowl, whisk together the egg yolks. Slowly pour the warm mixture into the egg yolks, whisking constantly, then scrape the warmed egg yolk mixture back into the saucepan.

Stir the mixture constantly over medium heat, scraping the sides and bottom as you stir (this is important so that the bottom/sides don't cook themselves solid), until the mixture thickens and coats the bottom of a spoon. You should be able to drag your finger across the spoon and the track stays clean- the sides won't run back together. Pour the custard through the strainer (this removes all the cooked bits) and stir it into the cream. Whisk the olive oil into the custard vigorously until well blended, then chill thoroughly in the fridge. (Lebovitz suggests stirring over an ice bath first, but I just put the whole bowl into the fridge straightaway).

When completely chilled, freeze it in your ice cream maker.