This recipe involves no bowl. No spoon. Nothing but a smooth countertop, the ingredients, and your hands. Oh, and lots of time. I had nothing better to do because I had a cake in the oven, so hey, why not throw together some pasta dough?
You make a ring of flour and crack the eggs into it, adding the few other ingredients as well. Then, with your fingers, you start to stir, incorporating flour slowly from the walls as you go, trying not to slosh egg over the sides and all over your counter and floor.
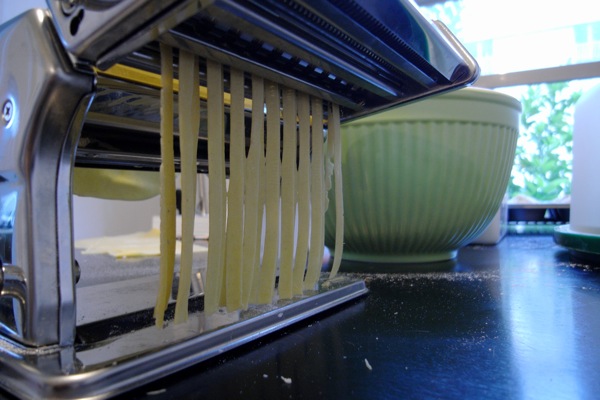
Eventually you work almost all of the flour in, and the dough becomes, well, dough, rather than goo. At this point you can start kneading, and go for as long as you can. Pretend it's exercise. Then the dough sits for a while, and then you put it through the machine.
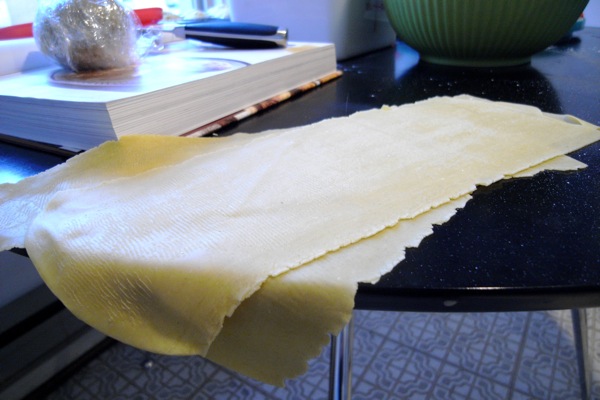
first in sheets and then in ribbons.
Boil it for a few minutes (until it floats) and then finish it in whatever sauce you intend to use. Cooking it for the last minute or so in the sauce gives it a more rich flavor.
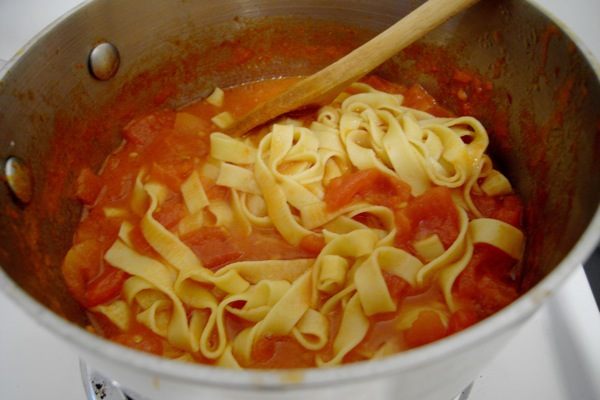
The sauce I used was very simple because I wanted to be able to taste the pasta. Tomatoes, butter, and an onion are all you need.
Making your own pasta is, as silly as this sounds, really rewarding. Like bread, it's not as hard as it looks and when you're done you can't believe you actually did it. It's also--like bread--so much more tasty than the store-bought kind.
I have one more recipe to try. This one was certainly the most labor-intensive of the bunch.
From Smitten Kitchen
Seven-Yolk Pasta Dough
Adapted from French Laundry Cookbook
1 3/4 cups (8 ounces) all-purpose flour
6 large egg yolks
1 large egg
1 1/2 teaspoons olive oil
1 tablespoon milk
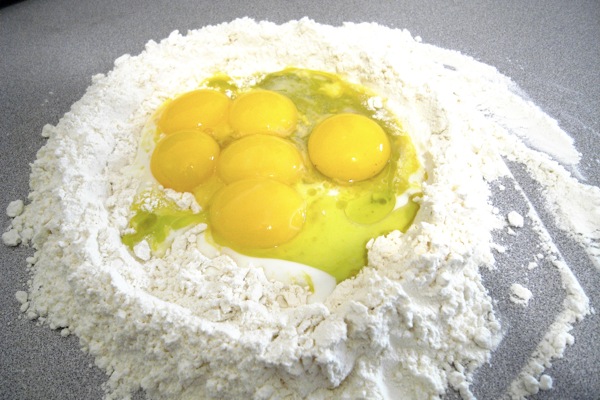
Mound flour on a board or other surface and create a well in the center, pushing the flour to all sides to make a ring with sides about 1-inch wide. Make sure that the well is wide enough to hold all the eggs without spilling.
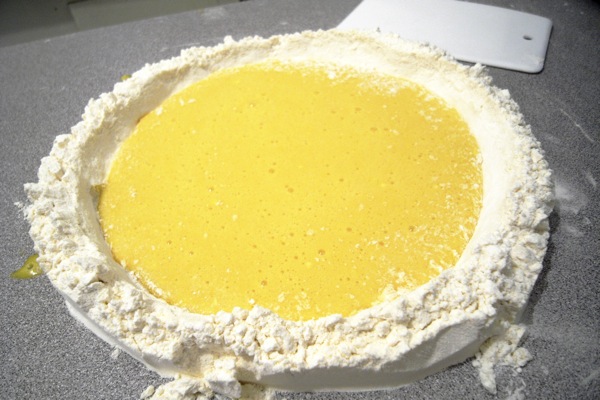
Pour the egg yolks, egg, oil and milk into the well. Use your fingers to break the eggs up. Still using your fingers, begin turning the eggs in a circular motion, keeping them within the well and not allowing them to spill over the sides. This circular motion allows the eggs to gradually pull in flour from the sides of the well; it is important that the flour not be incorporated too rapidly, or dough will be lumpy. Keep moving the eggs while slowly incorporating the flour. Using a pastry scraper, occasionally push the flour toward the eggs; the flour should be moved only enough to maintain the gradual incorporation of the flour, and the eggs should continue to be contained within the well. The mixture will thicken and eventually get too tight to keep turning with your fingers.
When the dough begins thickening and starts lifting itself from the board, begin incorporating the remaining flour with the pastry scraper by lifting the flour up and over the dough that’s beginning to form and cutting it into the dough. When the remaining flour from the sides of the well has been cut into the dough, the dough will still look shaggy. Bring the dough together with the palms of your hands and form it into a ball. It will look flaky but will hold together.
Knead the dough by pressing it, bit by bit, in a forward motion with the heels of your hands rather than folding it over on itself as you would with a bread dough. Re-form the dough into a ball and repeat the process several times. The dough should feel moist but not sticky. Let the dough rest for a few minutes while you clean the work surface.
Dust the clean work surface with a little flour. Knead the dough by pushing against it in a forward motion with the heels of your hands. Form the dough into a ball again and knead it again. Keep kneading in this forward motion until the dough becomes silky smooth. The dough is ready when you can pull your finger through it and the dough wants to snap back into place. The kneading process can take from 10 to 15 minutes.
Even if you think you are finished kneading, knead it for an extra 10 minutes; you cannot overknead this dough. It is important to work the dough long enough to pass the pull test; otherwise, when it rests, it will collapse.
Double-wrap the dough in plastic wrap to ensure that it does not dry out. Let the dough rest for at least 30 minutes and up to 1 hour before rolling it through a pasta machine. The dough can be made a day ahead, wrapped and refrigerated; bring to room temperature before proceeding.
The sauce I took from another food blog (a Seattle-ite also). Next time, I think I will try a puttanesca.
Tomato Sauce with Onion and Butter
Adapted from Essentials of Classic Italian Cooking, by Marcella Hazan
Via Orangette
2 cups whole, peeled, canned plum tomatoes, chopped, with their juices (about one 28-oz. can)
5 Tbsp. unsalted butter
1 medium yellow onion, peeled and cut in half
Salt, to taste
Combine the tomatoes, their juices, the butter, and the onion halves in a medium saucepan. Add a pinch or two of salt. Place over medium heat and bring to a simmer. Cook, uncovered, at a very slow but steady simmer, adjusting the heat as necessary, for about 45 minutes, or until droplets of fat float free from the tomato. Stir occasionally, mashing any large pieces of tomato with the back of a wooden spoon. Taste and salt as needed.
Discard the onion before tossing the sauce with pasta.
Yield: Enough sauce for about 1 pound of pasta, or 4 servings
No comments:
Post a Comment