Showing posts with label pastry school. Show all posts

2.01.2010

bread rotation, week 2

I was looking forward to the second week of the bread rotation. Looking forward to it! I had a list of breads I was excited to make:

Mt Hood (a hazelnut bread)
Snowcap Rye (a three-day rye bread)
Caraway Rye (a 40% rye bread with caraway seeds)
Seeded Sourdough (with flax, sunflower, sesame, and...another seed)
Beer Bread with Roasted Barley (I substituted oats)

My partner and I finished an Indian bread that we'd started the week before, called Aloo Partha. It involved a spiced potato filling wrapped in a whole wheat dough. I wish I'd taken photos as the assembly process was complex and interesting: a ball of dough is rolled out flat and filling is spread thinly over the whole. The round is then rolled into a cylinder, and the cylinder is wrapped into a spiral shape. The spiral is then rolled flat to create a round flat bread with layers of filling embedded throughout. I wish we'd made some chutney too- this bread was hearty enough to be lunch, and a dipping sauce of some sort would have completed it nicely.

The first solo bread I made was the Mt Hood. This bread required four separate preferments, which together made up roughly half of the final dough. From right to left- white sponge, whole wheat sponge, white levain, rye levain. The white sponge exploded because the container turned out to be too small to contain its growth- it more than doubled overnight!


These are combined with additional yeast, flour, salt, and in most cases water-- but I substituted an oaked hazelnut ale that a classmate of mine had made in the previous quarter. As I added this beer to the candied hazelnuts that give this bread its name (Oregon is known for its hazelnuts) I was aiming for a very nutty, slightly sweet bread with a complex flavor.

The bread seemed to like the additional yeast provided by the beer and it grew quite nicely during the bulk ferment:
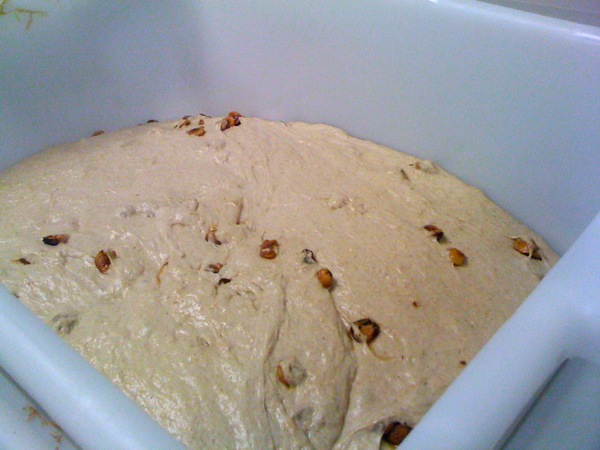


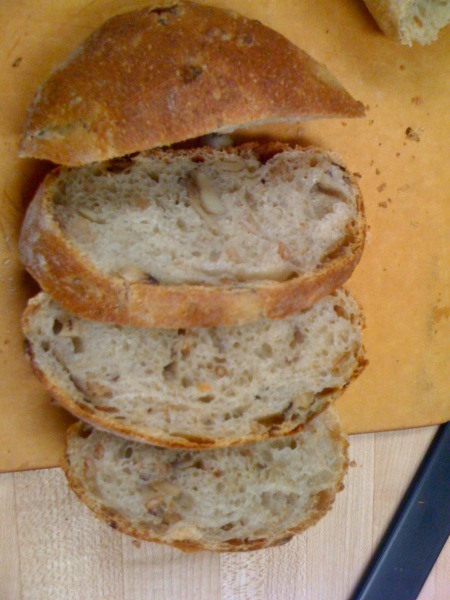
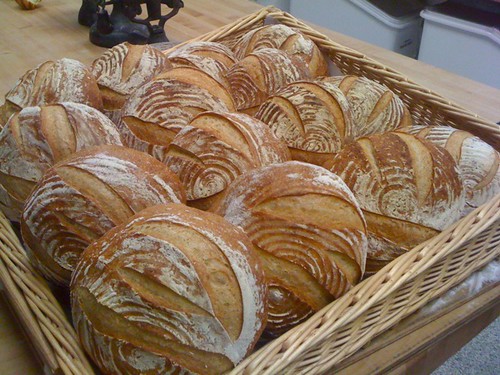
I shaped it into rounds and tried to do a pretty leaf scoring, which didn't work out so well... but the bread turned a lovely shade of brown in the oven, and came out dotted with toasted nuts:

"img src="http://farm5.static.flickr.com/4009/4311014690_a017e13f92_o.jpg">

As it turned out, this bread might be the best thing I've ever created. The hazelnuts and the beer gave it an almost nutella-like nutty sweetness, with a richness and depth from the preferments. It had a medium crumb, moist but offset by the crunch of the nuts. My coworkers devoured this bread and day-old loaves were used for what I'm told is the most amazing french toast ever. I will probably be making this bread for my fourth quarter final project.

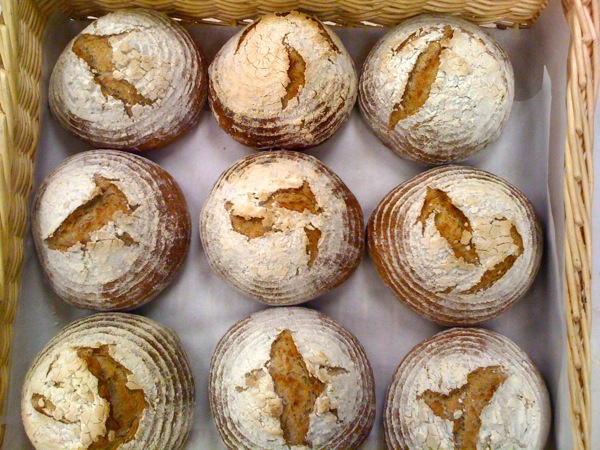
And then, somehow in that week, I managed to make all of the other breads listed-- a minor miracle, of which I am justifiably proud-- but I forgot to take photos of all of them. Except the snowcap rye, and I'm glad I remembered that, because it's just so pretty. So I leave you with this- a hearty rye bread topped with flour before baking so that the final proof in the oven poofs the top into something resembling (the recipe claims) one of the rocky mountains. You be the judge:
1.27.2010

third quarter bread rotation

This was my first rotation of the third quarter. I was (am) exhausted, and after the horrorfest of last quarter's bread rotation, I was terrified of breads. I just didn't want to do it. In fact, I chose it as my first rotation because I wanted to get it over with.

And then I learned to love the breads.

In this rotation, we chose which breads to do, when to do them, and how to manage our time. There was no schedule and there were very few rules. We could adapt recipes or bring in our own. I worked with a partner but this could involve as little or as much interaction as we wanted. Aside from the lack of sleep, I found this to be just lovely.

My first bread was a mushroom and farro bread, made with dried shiitake mushrooms, button mushrooms, and farro. The shiitake mushrooms were reconstituted in hot water, and that water was used as the liquid in the dough. The bread took two days- one to prep the mushrooms and the farro and the preferment, and one day to assemble, proof, and bake the bread.

mushroom farro bread

The bread had a lovely earthy flavor, and the farro added texture and a nuttiness. The shiitake mushrooms were better than expected (I worried about dried mushrooms) but the button mushrooms fell flat. Next time I'd use something else- the recipe called for porcini, but I didn't have those available.

My partner and I did one bread together in this first week, and that was the german pumpernickel. This bread is composed entirely of rye and bakes over 16 hours at low heat, and then must cool for an additional four hours or so before it can be sliced. The dough involves a preferment and a soaker (rye and shredded rye) and so the final process takes roughly four days. The result is an exceptionally dense and flavorful bread, made exceptionally dark due not only to the rye but also to the maillard reaction triggered by this baking method.

The claylike dough does not want to be kneaded in the mixer; it simply coats the inside of the bowl in an interesting homage to negative space:


My three-day bread (the one requirement we had was that we choose a three-day bread) was an olive levain, made with three kinds of olives and a sourdough levain. Three-day breads have a preferment and then are given a long overnight proof after their final shaping so that they can develop more and more complex flavor. I used kalamata olives from school as well as two kinds of spanish olives (one oil-cured) from work. This bread was fantastic and I would definitely make it again. I may try to adapt the recipe for home use.

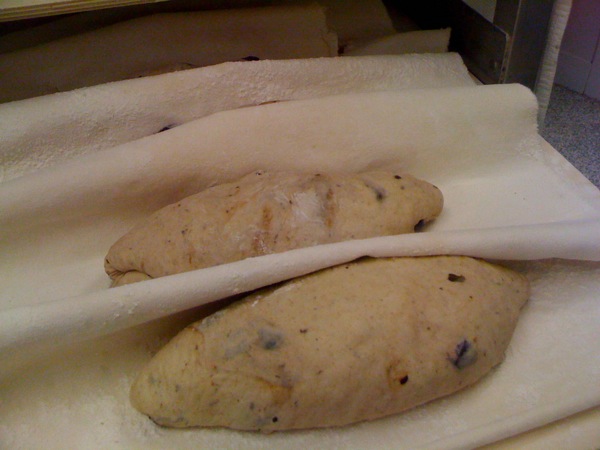
Here the bread has been given its final shape and is ready to rest and proof overnight:


Once baked, the scoring down the center makes it look as though it's just bursting with olives:


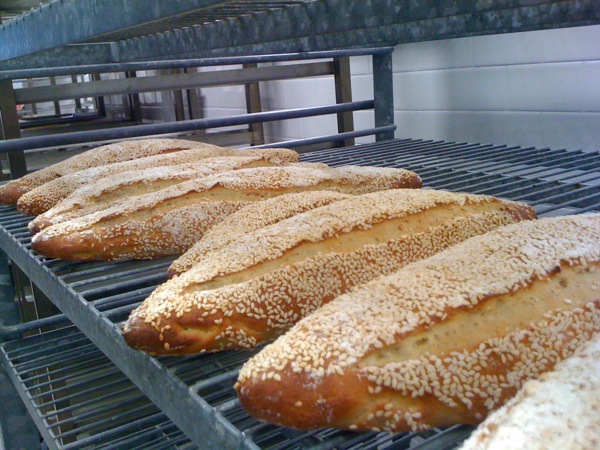
My disaster for the week was the semolina sesame bread. The preferment was very, very wet and the amount of flour in the final dough in no way yielded what the recipe claimed would be a 'stiff' product. It was downright soupy. I had to had more and more flour (durum) and in the end this probably caused quite a bit of overmixing. By the time the bread was done proofing it was clear that there wasn't enough time to bake it, and we had to retard it overnight- not usually done for this kind of bread.

By the next day, the bread had formed a crust (not enough humidity in the retarder) and while this isn't always a problem, in this case the bread had to be re-shaped. After the overmixing, the extra-long proofing, and then this over-shaping, the final product was dense and not pleasant to the taste. Alas.


I had so badly wanted to do a number of sesame breads, but after that experience, I was done with that idea.

And that was week one: german pumpernickel, mushroom farro bread, olive levain, and semolina sesame.

1.03.2010

individual desserts

This is one of the new rotations for second quarter: small desserts, or petit-fours. These are elaborately constructed tiny things that take maybe 4 or 5 bites to eat.

We started off easy, with pate a choux, which is the dough used to make profiteroles or cream puffs and eclairs. We piped this into circles like doughnuts, filled them with praline mousseline, and coated them in almonds and powdered sugar. They are called Paris-Brest and are often named to commemorate a bicycle race between the two cities (hence their wheel-like shape).

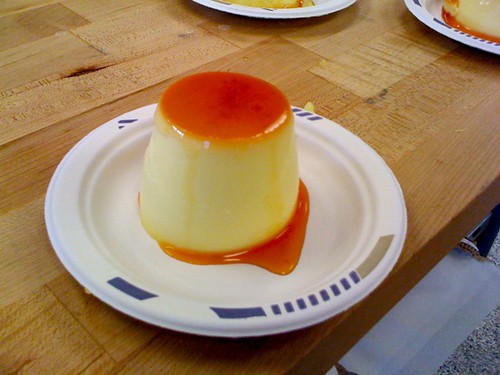
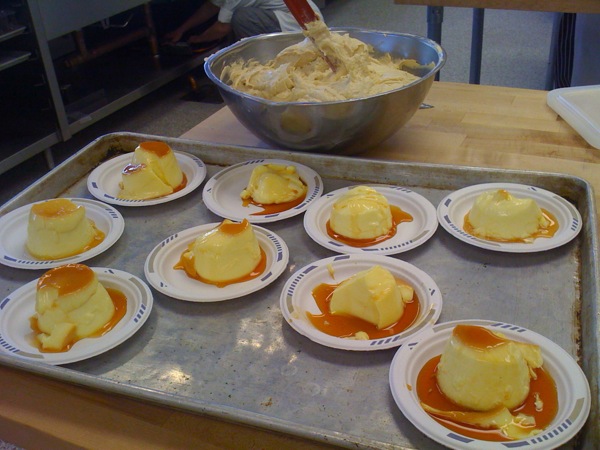
After that, we moved on to custards. We made flan, which involved filling teacups with caramel and then a rich eggy mixture and baking it in a water bath for about an hour. The process had two difficult points, neither of which had anything to do with the recipe itself. First, moving a hotel pan full of boiling water to and from an oven is frightening and scary. If the water sloshes over the tops of the cups, the custard is ruined. If the water sloshes over you, well, ow.


The second frustrating part is turning the custards out of their teacups. You run a knife around the edge of the cup, breaking the seal, and pull the custard away from the side a bit, breaking the vacuum. then you flip the cup upside down and the custard plops out like the one above, right? Ha. Witness:


Those are all the failed flans, which came out in pieces or fell apart as soon as they hit the plate. It is extremely frustrating to finish something well and then ruin it when you're trying to get it onto the plate. We couldn't sell any of those, and they all went to student lunch.

We also couldn't sell this, the large flan (we ran out of teacups), because we didn't have a take-away plate large enough and slices would have been hideous. It's too bad, because it turned out beautifully:


After flan we moved on to creme caramel, which is much the same process, except that you get to torch the tops to form a glass-like sugary caramel-y crust. Ours was flavored with bailey's irish cream and chocolate, but I didn't think that the flavors came through very well. Needed more booze, or more chocolate, or both. Or something. No pictures of that, simply because I forgot.

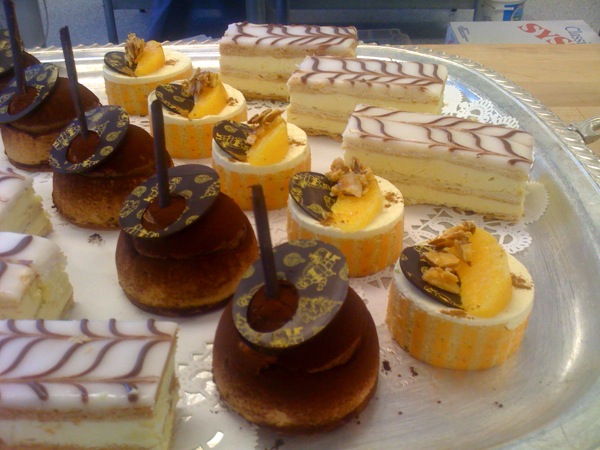
The next week we moved on to the petit-fours:


from left to right:
napoleons: blitz puff pastry and rich pastry cream, covered in fondant.
chocolate bombes: chocolate mousse and caramel mousse layered over rive gauche (chocolate) cake.
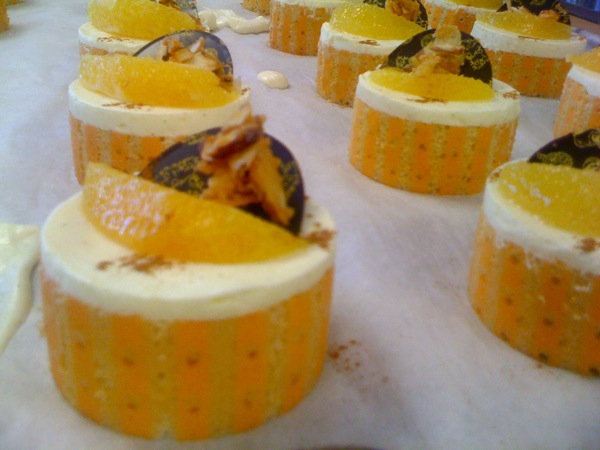
bavarian cakes: almond sponge cake decorated with orange tulipe batter and filled with orange bavarian cream.

The bombes were like a mini version of what I'd done in my cake rotation, so I was comfortable with those, and the napoleons are amazingly simple to make (despite being an utter mess to eat). The most complicated part of all of this was making the stripes on the bavarian-filled cake.


You make a batter of egg whites and powdered sugar and a bit of bread flour (called a tulipe batter), spread it into a sheet pan atop a silpat, and then use this giant long device to make a stripey design on it. Your hands need to move straight and your pressure needs to be perfect and even for the best result. The tray is then frozen and afterwards the cake batter poured on top of the pattern and baked. when the cake is flipped out and the silpat removed, the stripes will remain on the cake. Voila!

Then you spend an hour cutting the cake into wee strips and circles to make these cakes.

And that, folks, was the end of my second quarter in pastry school.

12.28.2009

bread rotation

Second quarter's bread rotation was extremely stressful. The workload was designed for five or six people, and one rotation group had seven. My rotation had FOUR. This might not sound like much of a problem, but it was. Every day it felt like we were worried about time, and rushing to get things done. Work that we trusted to the first-quarter students didn't get done properly and had to be re-done the next morning, costing more time. We had to get to the bakeshop early every day to get the ovens on and the first dough mixed, because otherwise it wouldn't rise in time to use. '

On top of that, I started a new job that week, and my rotation partner moved from one apartment to another. We were an exhausted mess and how we got through those two weeks is beyond me. I did miss one day of that rotation.

So all that is a way of saying that I'm going to post a lot of pictures of bread below, and I'm not sure what all of them are. I barely remembered to take photos at all in the rush to get things out and down to the case.

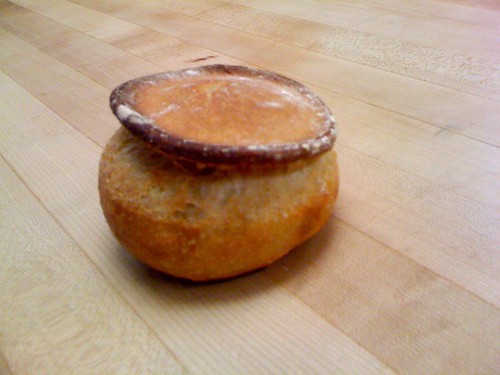
No idea what this one is:


This is a capuchin roll, named after the monk's caps. We made them for Thanksgiving.


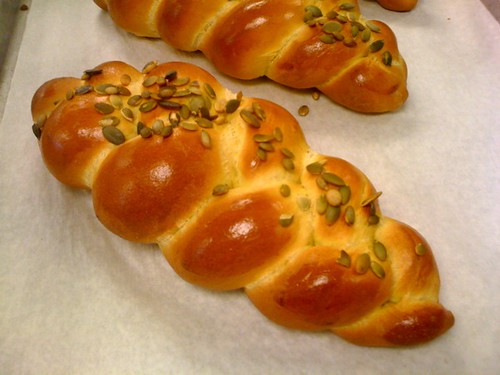
Butternut squash challah, topped with pumpkin seeds, also for Thanksgiving:


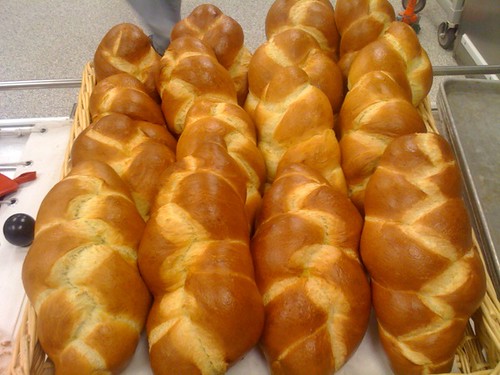
Regular challah:


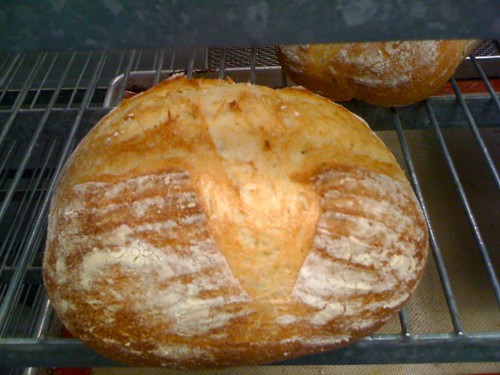
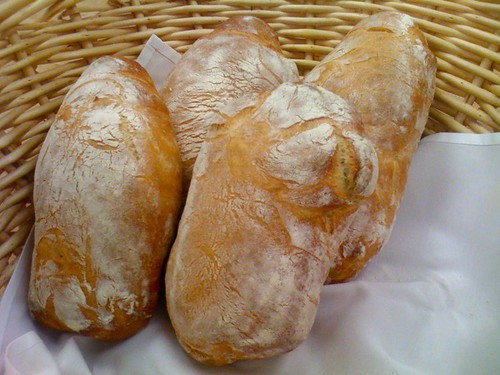
Judging by the irregular shapes, I'm guessing that this is rustic pain au levain, made with the pain ordinaire for lunch service (we used to make rolls for service, but no longer have the duchess that cut the dough for us, and we don't have the time to do it all by hand):


Another one I can't remember for sure, but it might be our three-day levain:


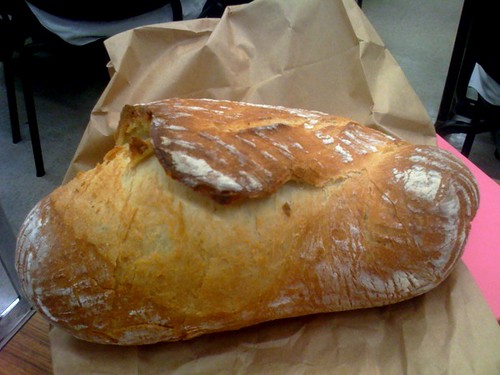
This bread was mis-weighed because we accidentally turned the baker's scale around. Instead of weighing each portion to be 18 ounces, we ended up with each portion being 30 ounces. But, it was delicious.


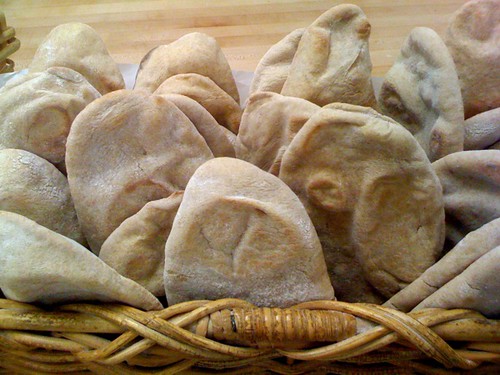
Naan made using a starter and wheat flour:


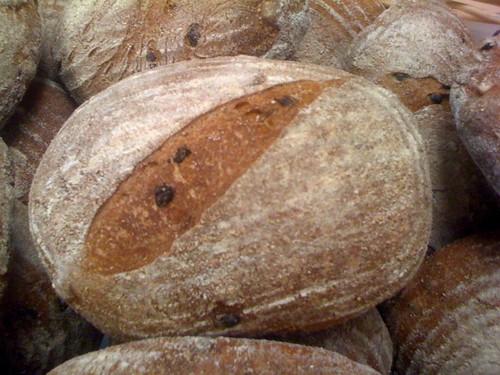
Hazelnut-currant bread:

11.17.2009

dome aux epices

This post is special because it means I've achieved a goal I set for this blog- posting more this year than last year. I know it's been in fits and starts and sporadic posting binges, but I've kept the blog going for two years and I've posted an average of three posts per month (almost one per week!) and that's not terrible. If I keep it going my goal is to schedule the posting binges out so that instead of getting two weeks with a post every day and then two months of silence, you get fourteen weeks of posts once a week.

Anyway, on to the point of this post: the dome. Also called a bombe. I had great fun telling people that I was building bombes at school (they are indeed heavy and delicate and complicated) and then someone told me that perhaps considering my ethnic background, I should choose different words for posting on the internet. No way. I am going to milk my punny joy for all it's worth.


This dessert contained six elements: a chocolate mousse, gingerbread bavarian cream, spice cake (mostly egg whites and almond meal), shiny chocolate icing, gingerbread syrup, and a different spice cake (rye flour, honey) that served as an ingredient in the cream and the syrup.

The spice cakes are made first, and then the syrup, the cream, the mousse. The icing can be made whenever.

First, you pipe chocolate mousse into the molds a little over 1/3 of the way up. You dunk a circular cutout of the spice cake into the spice syrup and place it in the center of the mousse, pressing it in so that it's all level. You want the mold to be about half full when the cake is in.


Then you pipe in the spice bavarian cream, leaving about 1/4"-1/2" of space at the top so that you can press in another layer of dunked spice cake. Once the cake is in and level with the top of the mold, you can go back with more cream and fill in any space in the edges.


Then the dessert needs to be completely frozen. I put it in the blast freezer overnight. When you're ready to unmold, you want your shiny chocolate icing ready. These dessserts are unmolded in a tricky way. I thought I'd flip the mold over, torch the outside, and pop the mold off. No. You take a large bowl of hot water, dunk the mold in (don't get the cake wet!) and then flip the dessert out.

Flip the dessert out. Does that sound easy? This is what it involves: hold the wet mold in one hand. In your other hand, take a cardboard round a bit smaller than the diameter of the mold, and place it over the exposed cake. Press on one side so that the dome slides in the mold, and as it slides, invert your hands so that the mold comes off and the cake ends up upright on the round in your hand. Attempt to put the round down without touching any of the mousse.


Then freeze the tray again so that the slightly-softened mousses can set before you pour slightly-warm chocolate icing over them.

This chocolate icing is gorgeous. It's a deep, shiny black and it looks glittery. It's also a giant pain in the ass and I hate it. It has to cook for ages and it has to be poured at the right temperature, in great volume, quickly. You get one shot to pour it, because it begins to set immediately and any more poured over it won't smooth out. It also never sets entirely, and therefore nothing can touch the dessert at any point after it's been poured- not your spatula, not your fingers, not the sides of sheet trays or racks or doilies. The glaze will stick and peel off in a sheet.


On the plus side, decor sticks really well!


The chocolate mousse used in this dessert might be the best chocolate mousse I've tasted, so even though the recipe is a pain, I am going to give it to you because the texture and flavor are fabulous. It's silky and decadent.

Chocolate Mousse
140g sugar
50g water
120g yolk
100g whole eggs
350g chocolate 65%
500g whipped cream

Whip the yolks and whole eggs in a mixer. Cook the sugar and water to 240F (soft ball). While the mixer is running on high, slowly pour the soft-ball sugar down the side of the bowl into the eggs. Whip on high until cool. The mixture will be light and very fluffy (this is called a pate a bombe base). Melt the chocolate and cool until the whipped cream can be folded in without collapsing. Then fold in the pate a bombe.

11.16.2009

le monte cristo

This was the second cake I worked on, and it involved six separate elements: sacher chocolate cake, pastry cream, butter cream (combined into a mousseline coffee cream), coffee ganache, and trablit syrup.


This recipe also diverged the furthest from the printed version. By way of example, I am going to give you the cake and the mousseline procedures, as written and as performed.

Sacher chocolate cake:
650g marzipan at 50% (use almond paste)
400g icing sugar (use powdered sugar)
320g yolks (note: one yolk is ~15g)
150g butter
150g cocoa
75g flour
75g cornflour (use cornstarch)
480g egg whites
70g sugar

Recipe as printed:
In an electric mixer, whip the marzipan with the icing sugar. Add the yolks and the whole eggs gradually, beating until smooth. Whisk the eggs whites and and sugar to a firm snow, then fold a part of this into the marzipan mixture, then the melted butter, and the sifted mixture of flour, cornflour, cocoa, and finally the remainder of the egg whites. Spread out onto 60cm x 40cm silpat sheets at the rate of 650g/tray.

Recipe as performed:
Using the paddle, beat the almond paste at high speed until smooth. Lower speed and add the yolks one by one, beating until incorporated before adding the next. Change to the whisk attachment. Beat the whole eggs and sugar into the yolk-almond paste until uniform. While this is happening, use another mixer to beat the egg whites and sugar to firm peaks. By hand, fold this into the egg-almond-sugar mixture. Then fold in all the remaining sifted dry ingredients. Then fold in all the butter. Spread onto one silpat-lined sheet tray.

Mousseline coffee cream:
700g pastry cream
1200g buttercream
60g trablit (coffee essence)

Recipe as printed:
In the beater, with a whisk, flavor the pastry cream with the trablit, then, in second gear, incorporate the butter cream bit by bit.

Recipe as performed:
Whip the pastry cream by hand. Whip the trablit and buttercream by hand. Fold buttercream and pastry cream together, VERY CAREFULLY, by hand. Work the mixture as little as humanly possible.

(Chef's comment: "If you put this in the mixer, at all, I guarantee that it will break.")

Even the pastry cream and buttercream procedures as written do not mention tempering the egg yolks (they say "pour scalded milk over the creamed yolks and sugar") and so basically ask you to scramble your eggs.

Lesson: careful with recipes.


The cake turned out well, with two layers of chocolate-almond cake, a layer of the coffee mousseline, and a thick layer of coffee chocolate ganache. The sheet cake had to be skinned and leveled by hand, which was a terrifying procedure, but in the end my layers looked better than I'd expected they would. The whole cake was auctioned off for charity and the small slices were sold in the pastry case.

11.15.2009

cake and tart rotation

All I did was cakes. Two weeks, three cakes, and more creme anglaise than I ever thought I'd make.

This rotation taught me a lot about recipes. Namely, that one should never follow them. They are provided as a ruse to trick the eager and unsuspecting student. The chef is waiting for you to come to him to ask about technique, at which point he will inform you that what is written on that paper in your hand will only yield disaster.

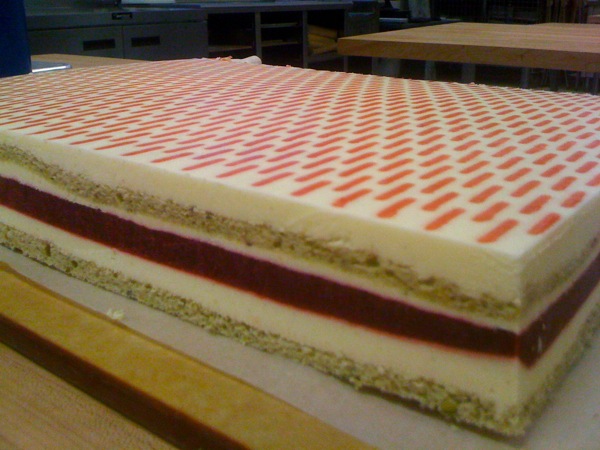
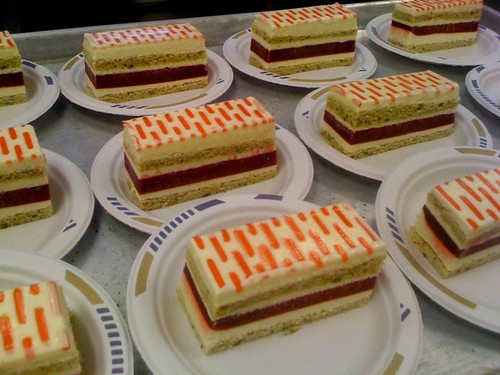
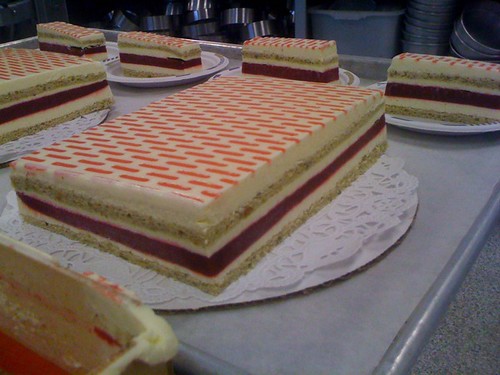
The first cake is the emeraude pistache framboise. It is a layer cake composed of a pistachio sponge cake, a vanilla bavarian, and a raspberry gelee. This cake is mostly an exercise in getting layers spread across a sheet pan to be of an even depth, and that's harder than you'd think. I don't know why someone doesn't invent a cake collar with a grid. Or one that's transparent.

As you can see, this part of the cake looks great. Nice, even layers. Until you get to that bit on the left there. Oops.


The cake was made and assembled over two days, frozen overnight, and then cut and sold on the third day.


I ended up with sixteen small pieces and two medium cakes. The slices are cut with a long double-handled knife, and we heat the blade with a blow torch between slices. Since the cake is frozen, this makes slicing through it very easy. It's like a hot cake guillotine.

11.14.2009

breaking down a bunny

Warning: this post is full of bunny bits and meaty photos. If you're just here for the sweets and are squicked out by dissection, you may want to skip what follows.

On the day I was to deconstruct the rabbit, it took a very long time to thaw. My fellow students had told me that it took them roughly two hours (!) to complete the project, but by the time I could start, I only had an hour and a half until the end of class, including the half-hour designated for cleanup. And I had to get to work. This did not bode well. But eventually, we began.

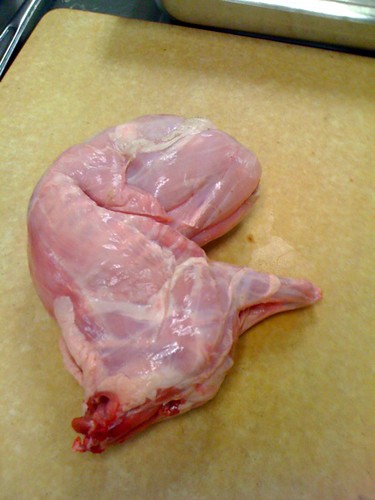
This is a bunny, straight out of the bag- it's got its hind legs tucked into its stomach cavity, which leaves it looking sort of like a fetus. This, predictably, bothered some people.


First, you take the hind legs out and remove the organs from the bunny. There will be heart, kidney, and liver. Because bunnies are classed as poultry in this country for processing, the organs are removed and then replaced during butchery, and the organs you get may not have belonged to the actual bunny in hand. Mine had three hearts, and the bunny of the student next to me had none.

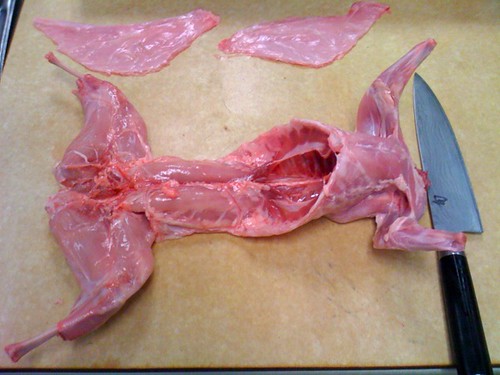
The first cut (after removing the kidney, which is left attached, and residual fat) is to remove the sides of the stomach area; there would be hangar steak and skirt steak here if this were a cow.


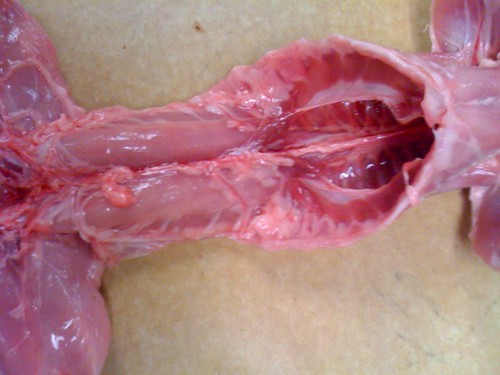
in this closeup you can see that the tenderloins- removing these is the next step. You must be careful, as they are small and fragile.


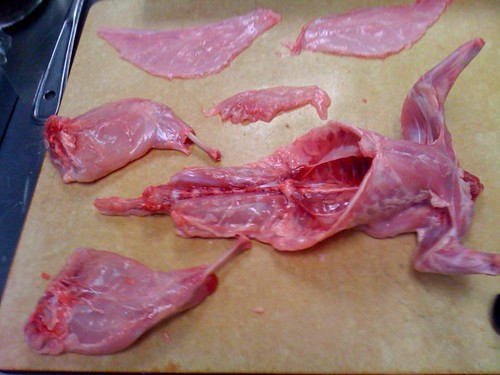
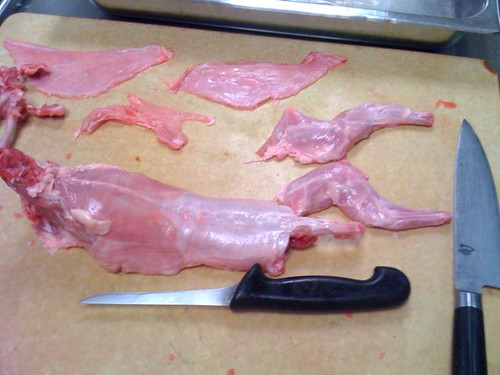
Once the tenderloins are taken care of (they're stacked together just above the bunny in the photo below) the hindquarters are removed, cutting up around the hip joint.

the legs are then deboned, leaving in the shinbone if desired. this is done by cutting around and along the bones on the seam visible there, starting with the wide end, scraping along the bone as you go.


After the hindquarters, the shoulders are removed completely (move the arm around to locate the edges of the scapulae) and deboned entirely. If there is an elegant way to do this, I'm not aware of it. I ended up with a messy pile of shoulder meat (I spared you that photo).


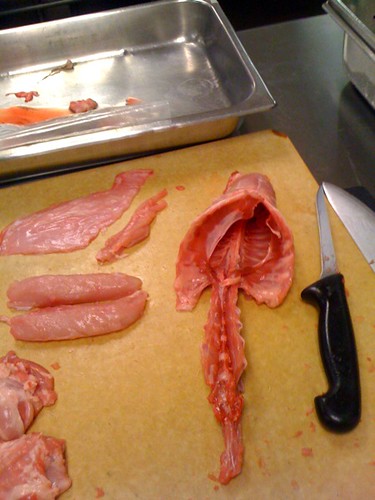
This is the point at which I ran out of time. The next cut is between the short ribs (top) and the long ribs (bottom). You cut toward the neck area until the short ribs are removed and the lower/back ribcage exposed.

The ribcage is separated from the lower spine by cutting where the ribcage meets the lower spine, and the top at the neck area is cut as well. Basically, cut away the spine that is not attached to the ribs.

The long ribs are trimmed to a reasonable length on each side, and then the ribs are cut from the spine to leave you with two little racks of rabbit. The ribs on these racks can then be frenched by cutting between the ribs and sliding the meat down to expose about 1/4"-1/2" of rib.


Bones can be used for stock. Meat yield in this project was around 70%.

11.13.2009

doughs, week two

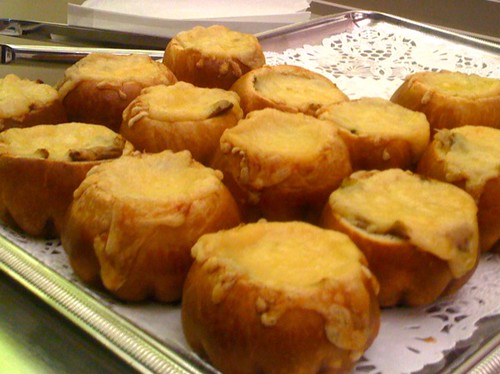
remember those failed brioche? my poor sad brioche-sans-tetes were reincarnated as something much more delicious today:

these are the brioche, hollowed out, and stuffed with leeks and mushrooms cooked in white wine and cream. the whole thing is topped with comte cheese and finished in the oven until the cheese bubbles and browns. they were SO GOOD.


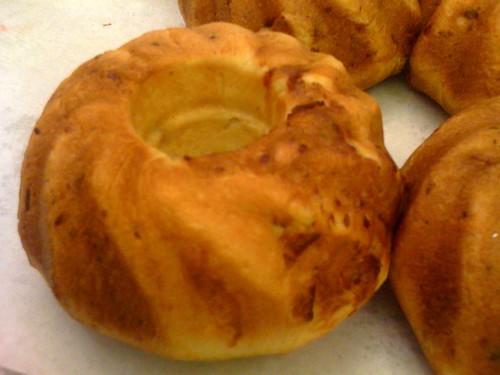
this is a kugelhopf. it's a brioche-like dough, filled with (in this case) ham, comte cheese, and onion. I wanted to eat it so bad.


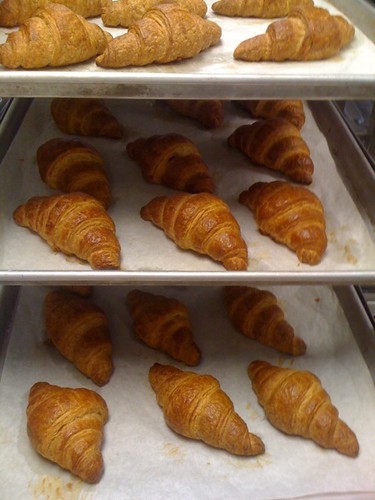
whole wheat croissants- i'm not a big fan of these (whole wheat? why not use nonfat butter too? just suck all the fun right out.) but people who like whole wheat said they were tasty.


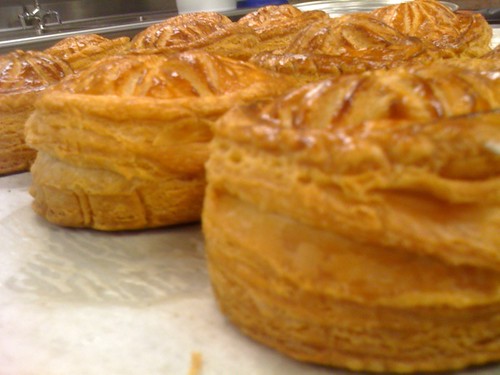
this is a pithivier; it's puff pastry (in this case, italian- contains honey and white wine) filled with whatever you like. mine contain ham, apples, blue cheese and walnuts. i called it a waldorf pithivier. in the oven they went from 1/4-1/2" thick to almost two inches. Magic!


And that's it for the dough rotation- croissants (regular and whole wheat, both with pre-ferments), brioche, puff pastry, and kugelhopfs. Lots of savory items, which are (shh, don't tell) my favorite. Next rotation is culinary.

11.12.2009

back in school

So I went back to school and immediately stopped posting. I apologize. Two jobs, a new internship, classes... *bitchwhinepissmoan*. Woe is me. But, I do have pictures and other things to share, and I'm going to start now before I get hopelessly behind and give up entirely.

These pictures are from the first week of my first rotation, which was doughs.

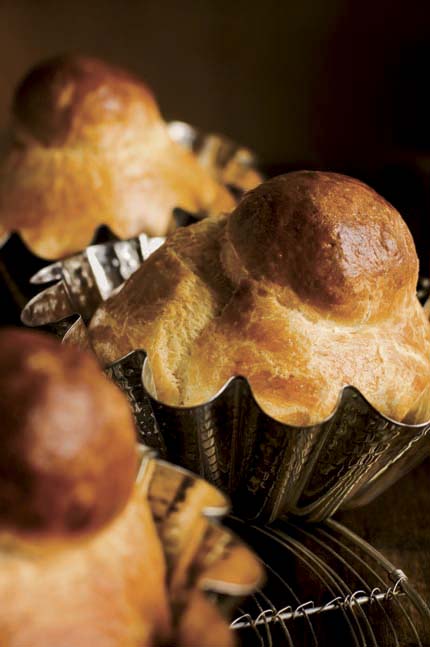
brioche a tetes- fail. misshapen and lost their heads.


they are supposed to look like this:


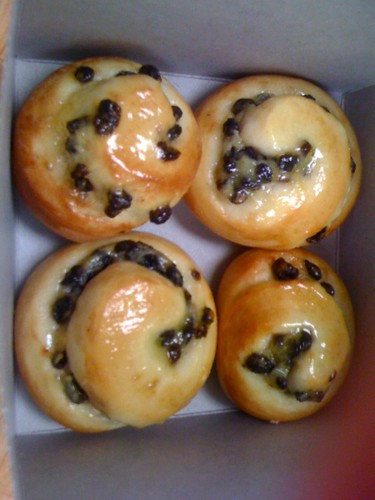
and these are pain au raisin, brioche rolled with vanilla pastry cream and rum-soaked currants, finished with an apricot glaze:


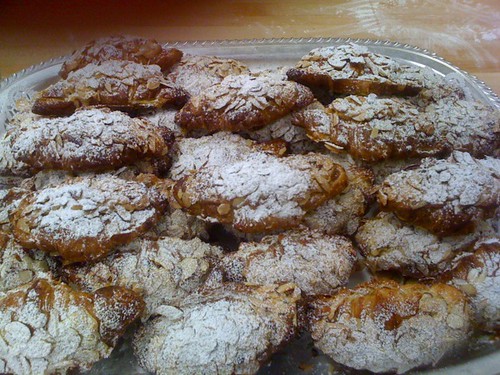
and finally, almond croissants- twice baked, soaked in rum simple syrup, filled with frangipane (almond paste), coated in almonds and powdered sugar:

8.14.2009

pastry school: now, with meats!

These are just some assorted photos from the day I joined the second quarter students for meat production. Even though it was 8:30am, they were making bacon and duck confit and CARVING UP WILBUR and I just couldn't resist. I chose the program at Central over South in part because I would get to do these things- for a pastry program, it's very broad.

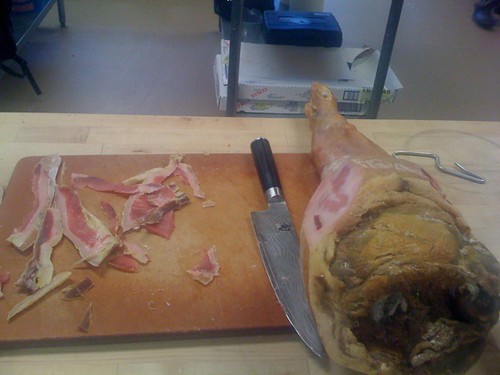
This is wilbur, carved open. Half of him was entirely delicious, but the other half wasn't done--the classroom wasn't dry enough. I can't wait to have a real charcuterie-hanging space after the remodel!


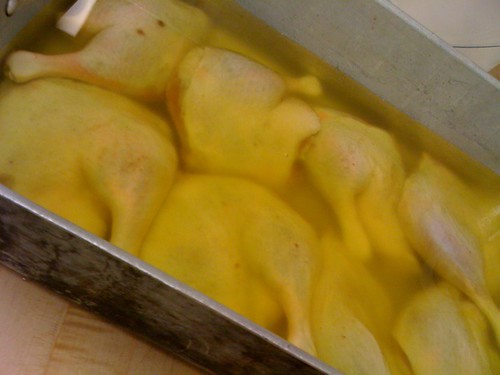
Duck confit-- 7lbs of duck fat poured over 8 duck thighs/legs and cooked sloooowly. When it was finished, it went into flaky pastries with some dried cherries. One of the best things I ever ate at school.


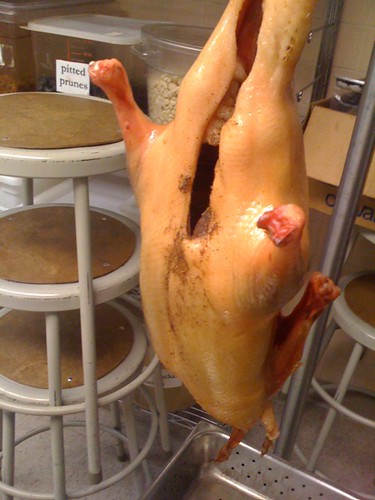
This spiced duck hung in the classroom for a while, but I have no clue what his fate was.


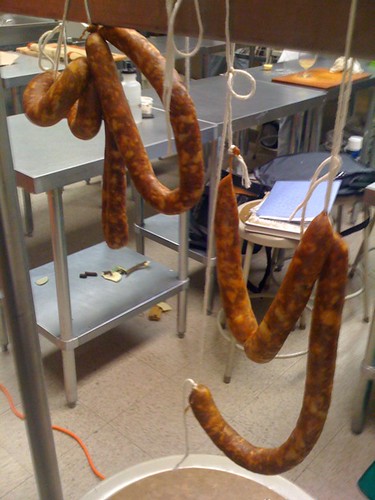
Sausages hanging in the classroom. Sad I didn't get to taste them.


I didn't get any pictures of the bacon because it was in the oven and then it was in the walk-in fridge, and neither location had great light for photos. Alas.